


Used with permission by Elaine Boddy. All rights reserved. 2022.
Sourdough Cookies by Annie Clapper
Sourdough Cookies by Annie Clapper
Annie and I are both huge fans of @wildwomanbakery and her jaw dropping sourdough cookie creations. We talked about our mutual love for cookies on Annie’s episode of the podcast. We were both mentored by our cottage bakery brother Jeff McCarthy and he graciously shared with us his recipe, tips, and tricks for great sourdough cookies. Annie, being dairy free, has a vegan take on sourdough cookies. Her recipe incorporates coconut oil in place of butter - and a healthy dose of peanut butter!
Ingredients (grams)
450 AP flour
50 kamut (or whole wheat)
8 baking soda
16 baking powder
10 salt
150 warmed coconut oil
135 warm water
600 brown sugar
180 peanut butter (or soy/sun butter— you do you)
10 vanilla
200 discard starter
284 chocolate chips
142 toasted chopped pecans
142 toasted chopped almonds
Whisk the flours, baking soda, baking powder, and salt together.
Whisk the warm coconut oil (should be liquid), brown sugar, vanilla, warm water, and nut butter together. Once combined, whisk the discard starter in and mix thoroughly.
Fold the dry ingredients into wet ingredients. Fold in the nuts and chocolate.
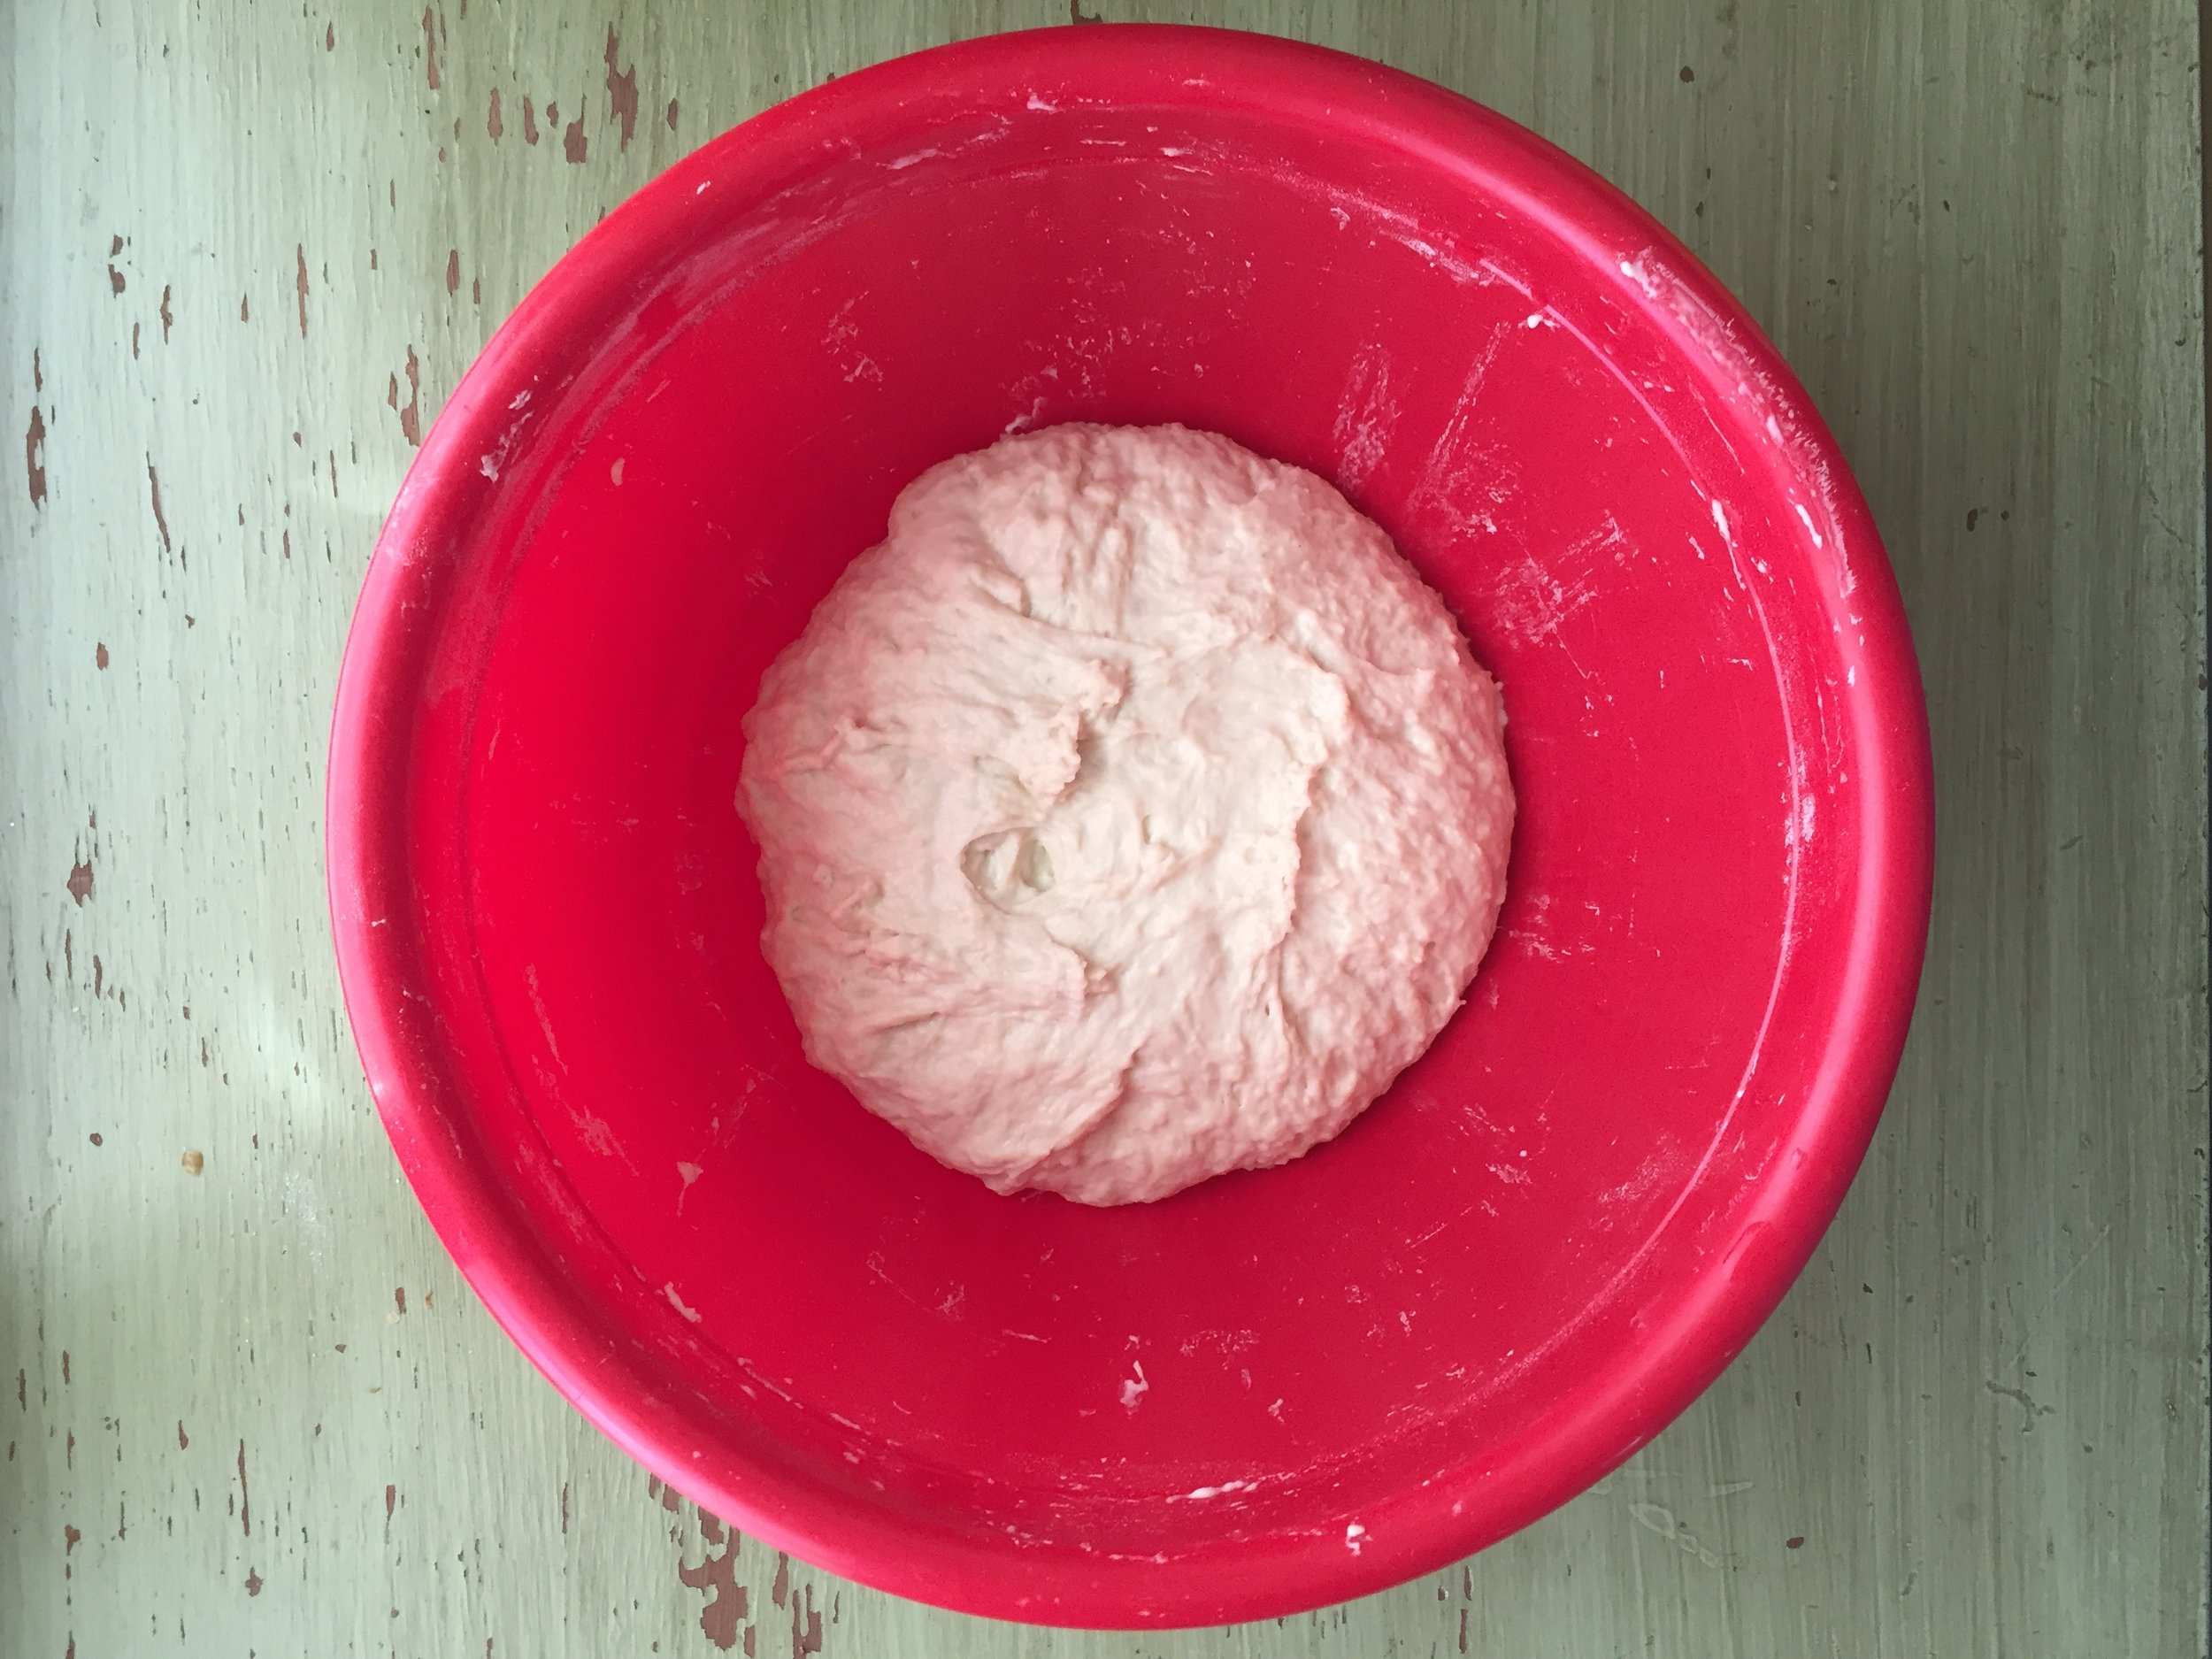
Transfer to an airtight container and let it ferment in the fridge for at least two days or up to a week.
Bring the dough to room temp, then scoop and freeze the dough balls. We bake our 125g dough balls for about 22 mins at 400F convection, but your time may/should vary depending on your oven and the size of your cookies.
Happy cookie-ing!
Used with permission by Annie Clapper, 2022

Sourdough Blueberry Tea Cake
Sourdough Blueberry Tea Cake
Recipe by Alexandra Allen of Wild Woman Bakery
INGREDIENTS
295 grams unsalted butter
155 grams evaporated cane sugar
185 grams light brown sugar
12 grams Pure Vanilla extract
70 grams Sourdough Starter 1:1 (At Peak)
3 eggs and 1 egg yolk
315 grams fresh-milled Sonora, Einkorn and Spelt or any flour of your choice
6 grams sea salt
230 grams whole milk or milk of choice
1.5 cups fresh blueberries
STEPS
Whip together butter, sugar and brown sugar for a minimum of 3 minutes.
Then add sourdough starter and mix for additional 2 minutes.
Making sure to scrape down the sides. Next add the eggs( room temp) one by one, and finally the vanilla extract.
Whip batter for an additional 4 minutes.
Lastly add the fresh milled flour in 3 parts , interchanging with the milk and always ending on flour!
Whip for a quick 15 seconds and fold in the blueberries, do not over mix, just make sure all of your flour is probably incorporated!
Cover batter with plastic wrap and allow to ferment in the bowl on your counter for a minimum of 3 hrs! I usually let mine go for 15+
Make sure your home temp isn’t higher than 73.
Grease a 9 inch round nonstick pan with plenty of butter
And gently spoon fermented sourdough tea cake batter into your greased loaf pan and smooth the top so it’s all even!
Next bake for 65 minutes at 350 degrees
Preheat your oven for a minimum of 45 minutes! Remember every oven differs, so test the middle with a toothpick at the 1 hr mark of baking and if it’s still raw cook for an addition 5 minutes!
Cool on a rack for 45 minutes in the loaf pan and then transfer to a different plate!
Hope you like it!!
Xoxo Alex
Used with permission by Alexandra Allen, 2022
Viking Rye from Beesham Soogrim

Sourdough Boston Brown Bread from Sourdough Culture by Eric Pallant

Sourdough Boston Brown Bread
Yield: 1 loaf
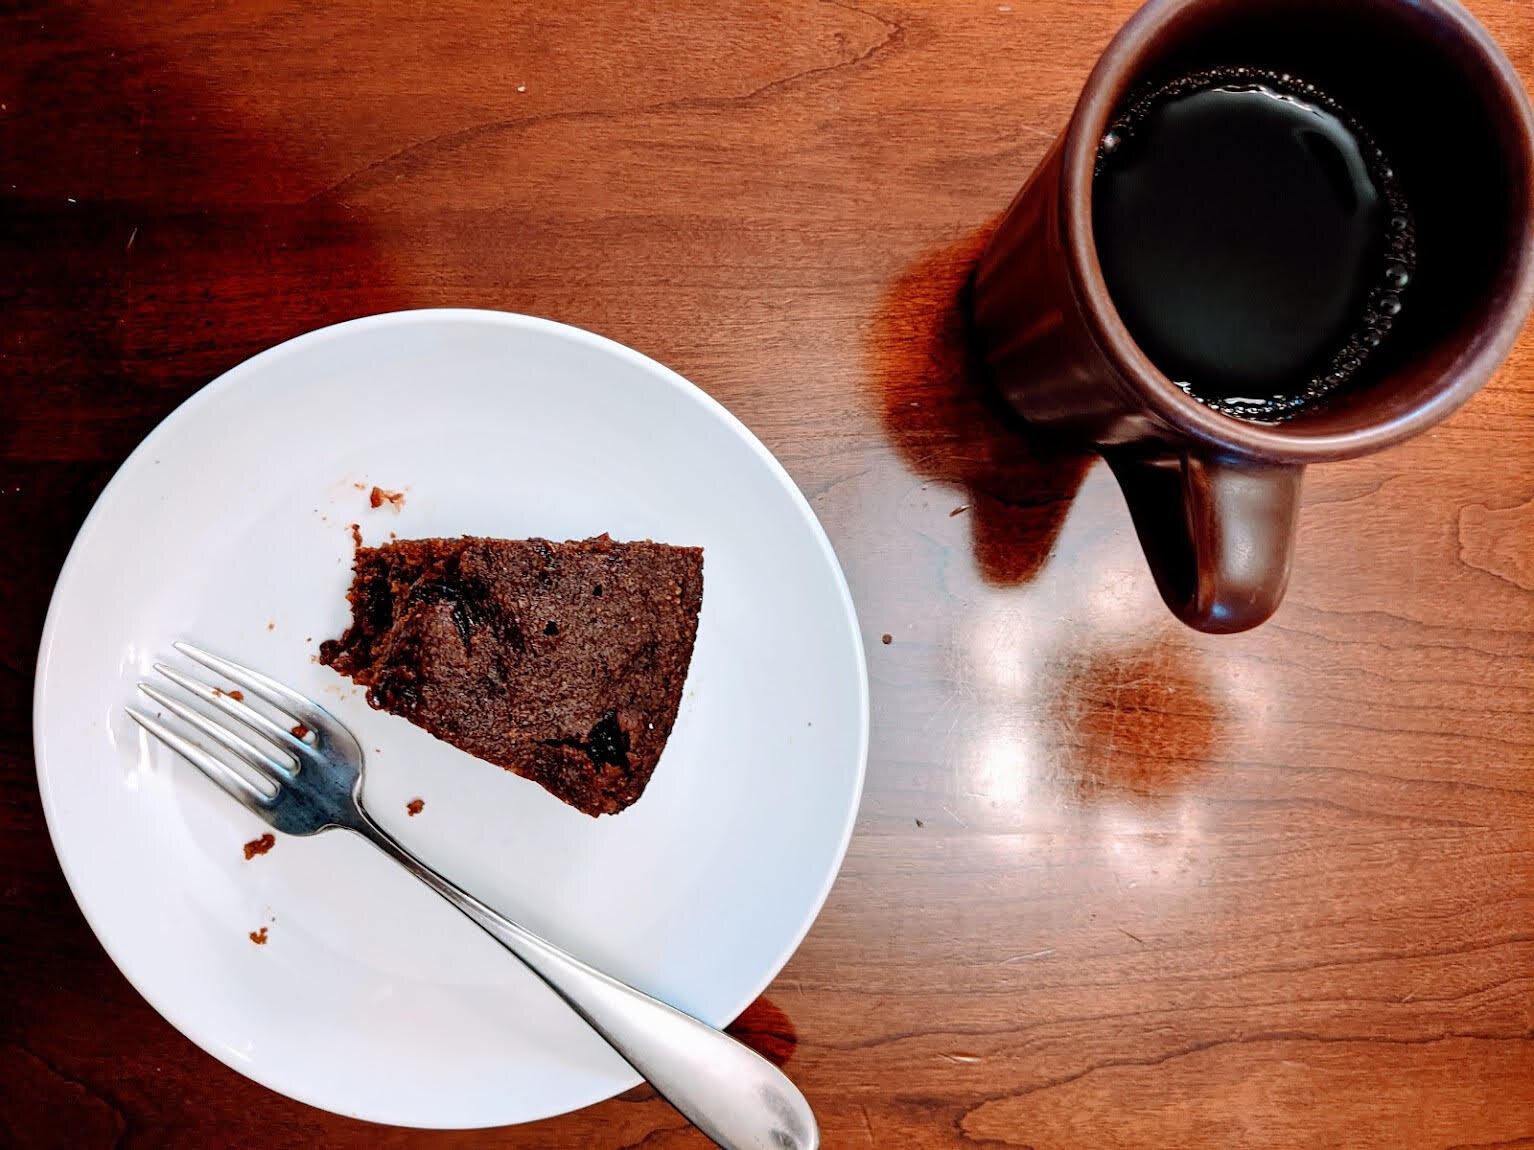
Among old cookbooks and across the internet one can find many recipes for Rye and Indian bread, Boston brown bread, or as it is sometimes called, thirded bread (because equal quantities of rye, wheat, and corn meals are used.) The final ratio of flours and quantities of ingredients depended upon what was available in the marketplace, the cost of each grain, the size of your covered cooker, and the number of people you wished to feed. The coarseness of the flour did not vary much; whole grains went to the miller, and unless you were exceptionally wealthy, unsieved, coarsely ground rye, wheat, and corn, with their bran and germ included, is what you took home. This is my variation. This bread is delicious with baked beans or a cup of dark coffee.

1 cup buttermilk, room temperature
⅔ cup whole milk, room temperature or warm
2 tablespoons active rye or wheat sourdough starter
½ cup molasses
3 tablespoons unsalted butter, melted
¾ cup whole rye flour
¾ cup whole wheat flour
¾ cup cornmeal
1 teaspoon kosher salt
1 cup raisins
In a large bowl, mix the buttermilk, milk, and sourdough starter together. Add the molasses and butter. Mix well to combine.
Add the rye flour, wheat flour, cornmeal, and salt, stirring until a smooth dough forms, then fold in the raisins.
Cover the bowl with a wet towel or plastic wrap, and let the dough rest at room temperature for 8 to 12 hours, or overnight.
Preheat the oven to 375°F. Grease a 10-inch Dutch oven well with butter or spray. You can also use a similar-size baking dish with a tight lid or a heavy cast-iron pot with a lid. The lid is important, as this bread is steamed.
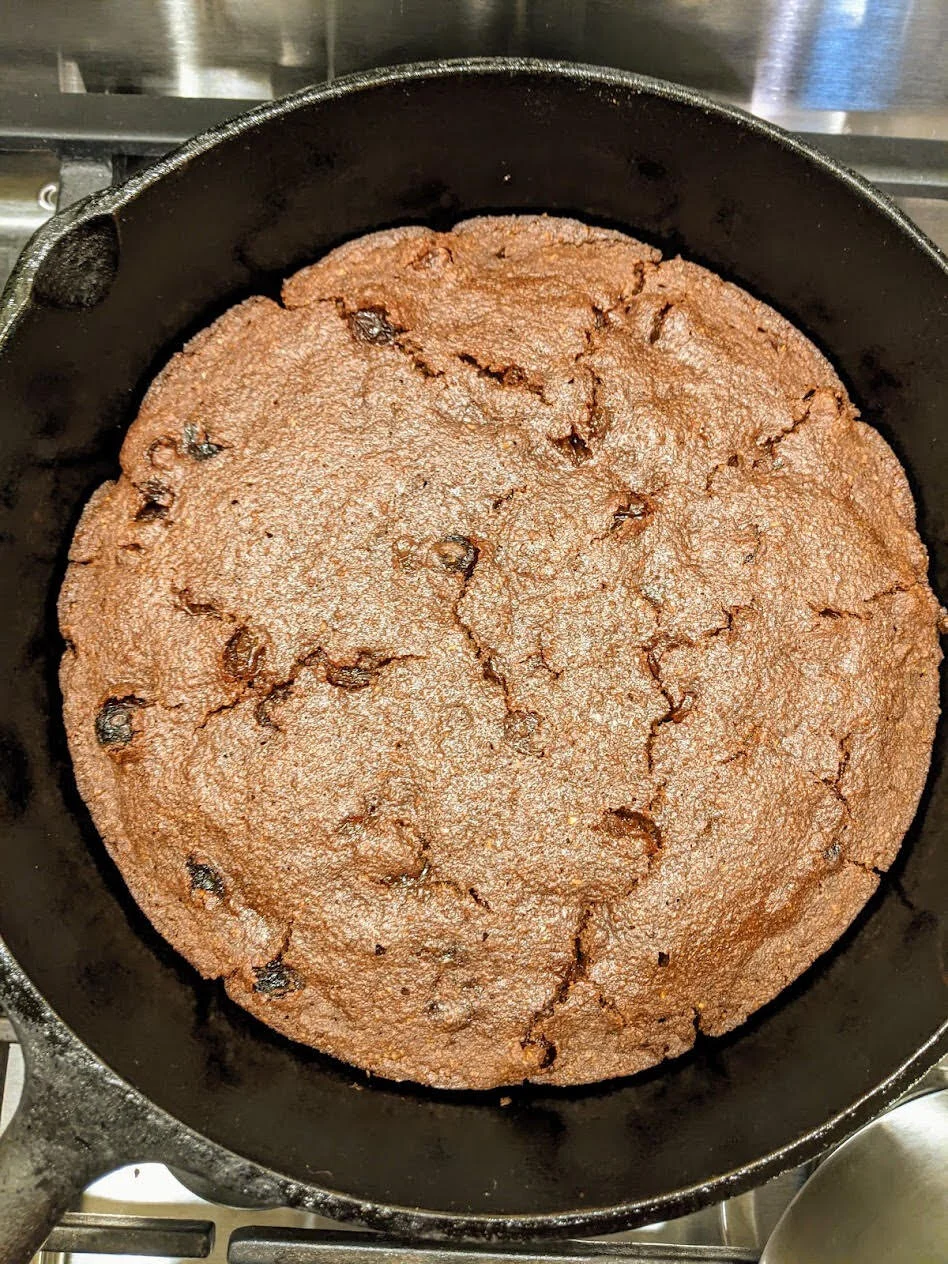
Pour the dough into the prepared Dutch oven and cover with the lid. Bake for about 90 minutes, or until a cake tester inserted into the middle of the bread comes out clean and the top of the bread shows cracks.
Let the bread rest in the Dutch oven for 5 minutes, then transfer it to a wire rack to cool slightly. Serve warm.
Reprinted with permission from Sourdough Culture by Eric Pallant, Agate, September 2021.
Sourdough Sweet Buns from Southern Ground and Walnut Schoolhouse


Click on photo to purchase SOUTHERN GROUND
Reprinted with permission from Southern Ground by Jennifer Lapidus, copyright (c) 2021. Published by Ten Speed Press, a division of Penguin Random House, LLC.
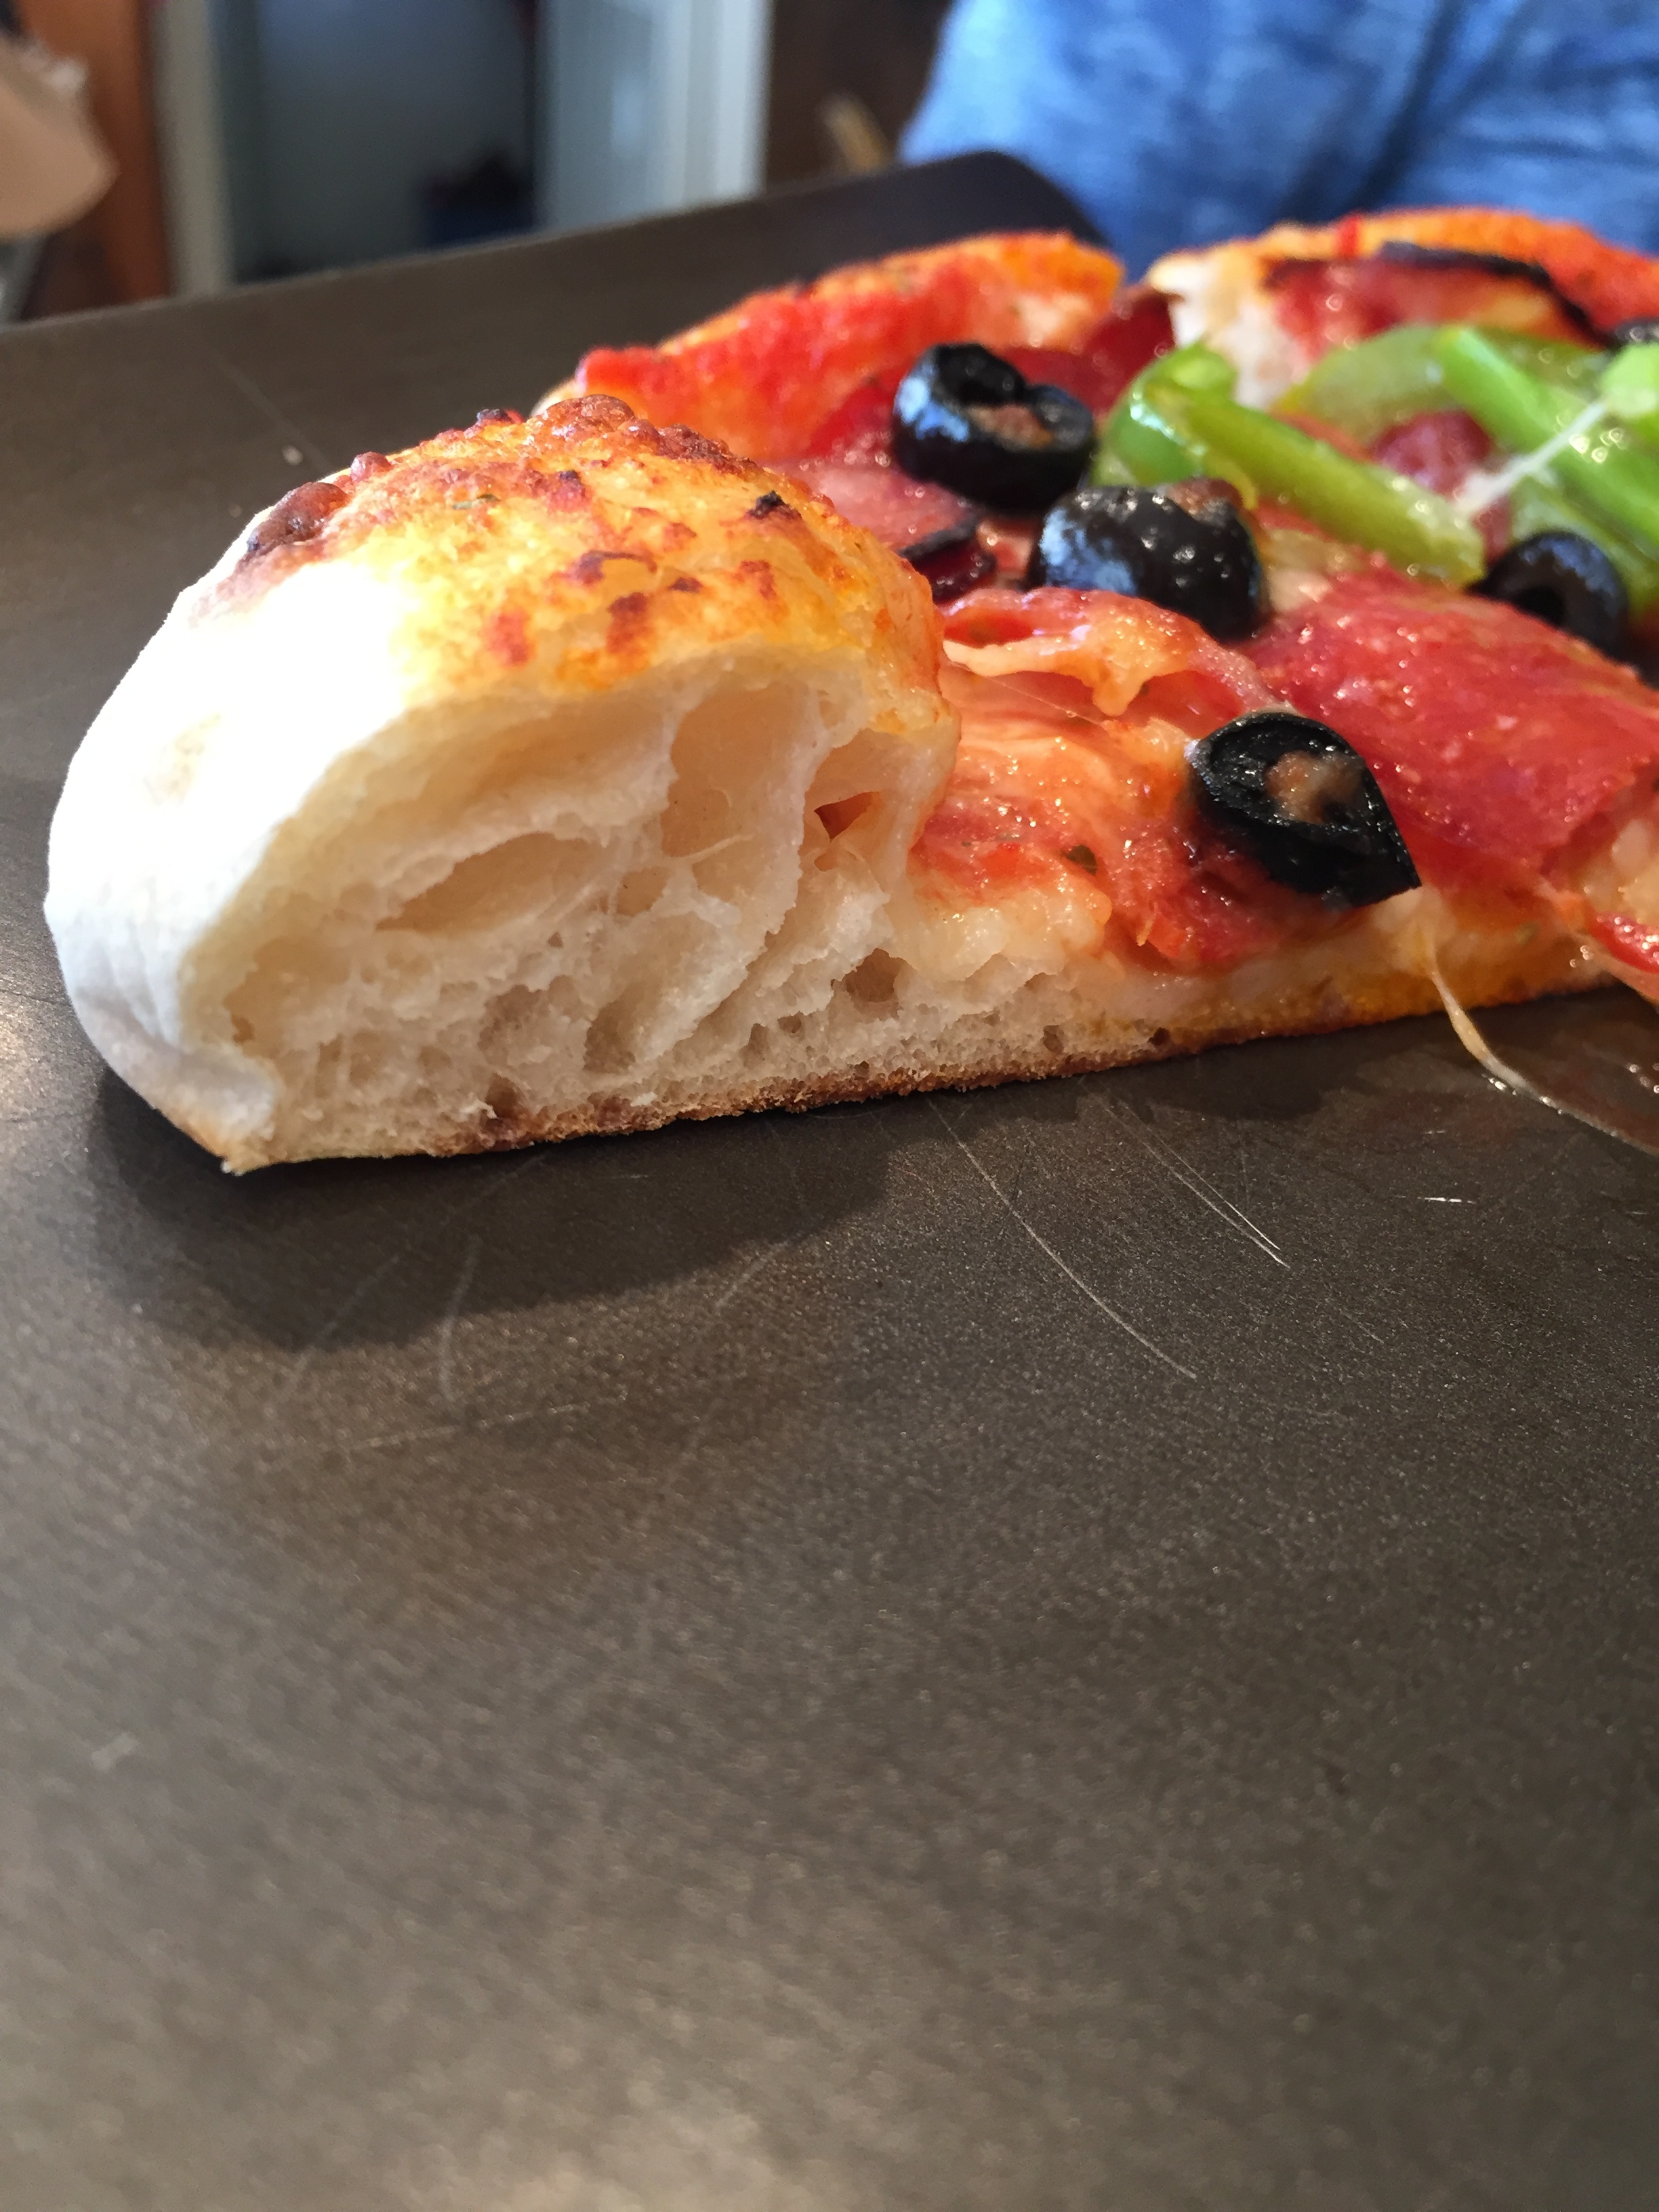
Sourdough Pizza from Chris Lem

Sourdough Pizza
By Chris Lem
“Behind every great pizza is a great dough.” Are you a crust or toppings person? For me the toppings are fun and great but the crust texture and flavor is the deal maker or deal breaker.
Today I’m sharing a sourdough pizza recipe for a home oven pizza baked on a @bakingsteel or a good quality (thick) pizza stone. Pizza people like to categorize pizza into various styles. “What style of pizza is this?” If I was pressed for an answer, I would say that this pizza could be described as artisanal sourdough bakery meets new school pizzeria, right on the thin to medium thickness divide. The pizza should be well baked with various shades of brown and some nice charring on the crust. Each slice should be light in the hand, a light eggshell crispiness to the crust and base with the soft, tender and flavorful artisan bread interior. I’m looking for nice color on the underside as well with many speckles of charring to provide more flavor. Like sourdough bread crust color, how bold the pizza maker bakes it is a matter of pure personal preference!
An active starter is a pre-requisite for this dough. Give your starter a few booster feeds before you mix this dough.

Amounts and Percentages (all percentages are as a percent of dry flour weight) for one 11-12 inch pizza. To scale up, multiply these amounts by the number of pizzas you’re making:
Dry ingredients
High Protein Bread flour: 95% (142 grams)
Whole wheat or spelt: 5% (8 grams)
Salt: 2.8% (4.2 grams)
Wet ingredients
Lukewarm Water: 63-68%: (95-102 grams- I’ve provided a range depending on how much water your flour absorbs)
Sourdough Starter: 20% (30 grams)
Extra virgin olive oil: 2.8% (4.2 grams)
Process
I like to keep my process as simple as possible, minimizing the number of steps, so I add everything all the ingredients in together when I mix the dough (no autolyse, no hold back of starter and salt).
Mix the flours and salt together.
In a separate bowl, dissolve starter in lukewarm water. Once dissolved, add your oil into the bowl and stir.
Pour the wet ingredients into the drys and hand mix to fully incorporate everything together. This incorporation may take a 3-5 minutes. Cover the bowl and let the mixture rest for 5 minutes. Keep the dough in a warm spot (76-80 F).
Knead the dough in the bowl for 2 minutes to start giving the dough that strength and structure (slide your hand under the dough, lift a quarter of dough upwards, give it a stretch upwards and push it back to the center of the bowl, in a “down and away” motion, then rotate the bowl and repeat this motion for 2 minutes). Let the dough rest for another 5 minutes.
Repeat step 4 two more times. By now the dough should be pretty smooth and you should be able to create a taut dough ball with surface tension. You’ve developed the gluten up front. The hard work has been done. How we let time run its magic.
Give the dough a pat for a job well done.
Cover the bowl with plastic and let the dough ferment in a warm spot (76-80°) for 2.5-4 hours. You can give it one stretch and fold during this time if you want. Pizza dough is not the same as bread dough; the upfront kneading combined with the lower hydration dough doesn’t require the same stretch and folds as a sourdough country loaf.
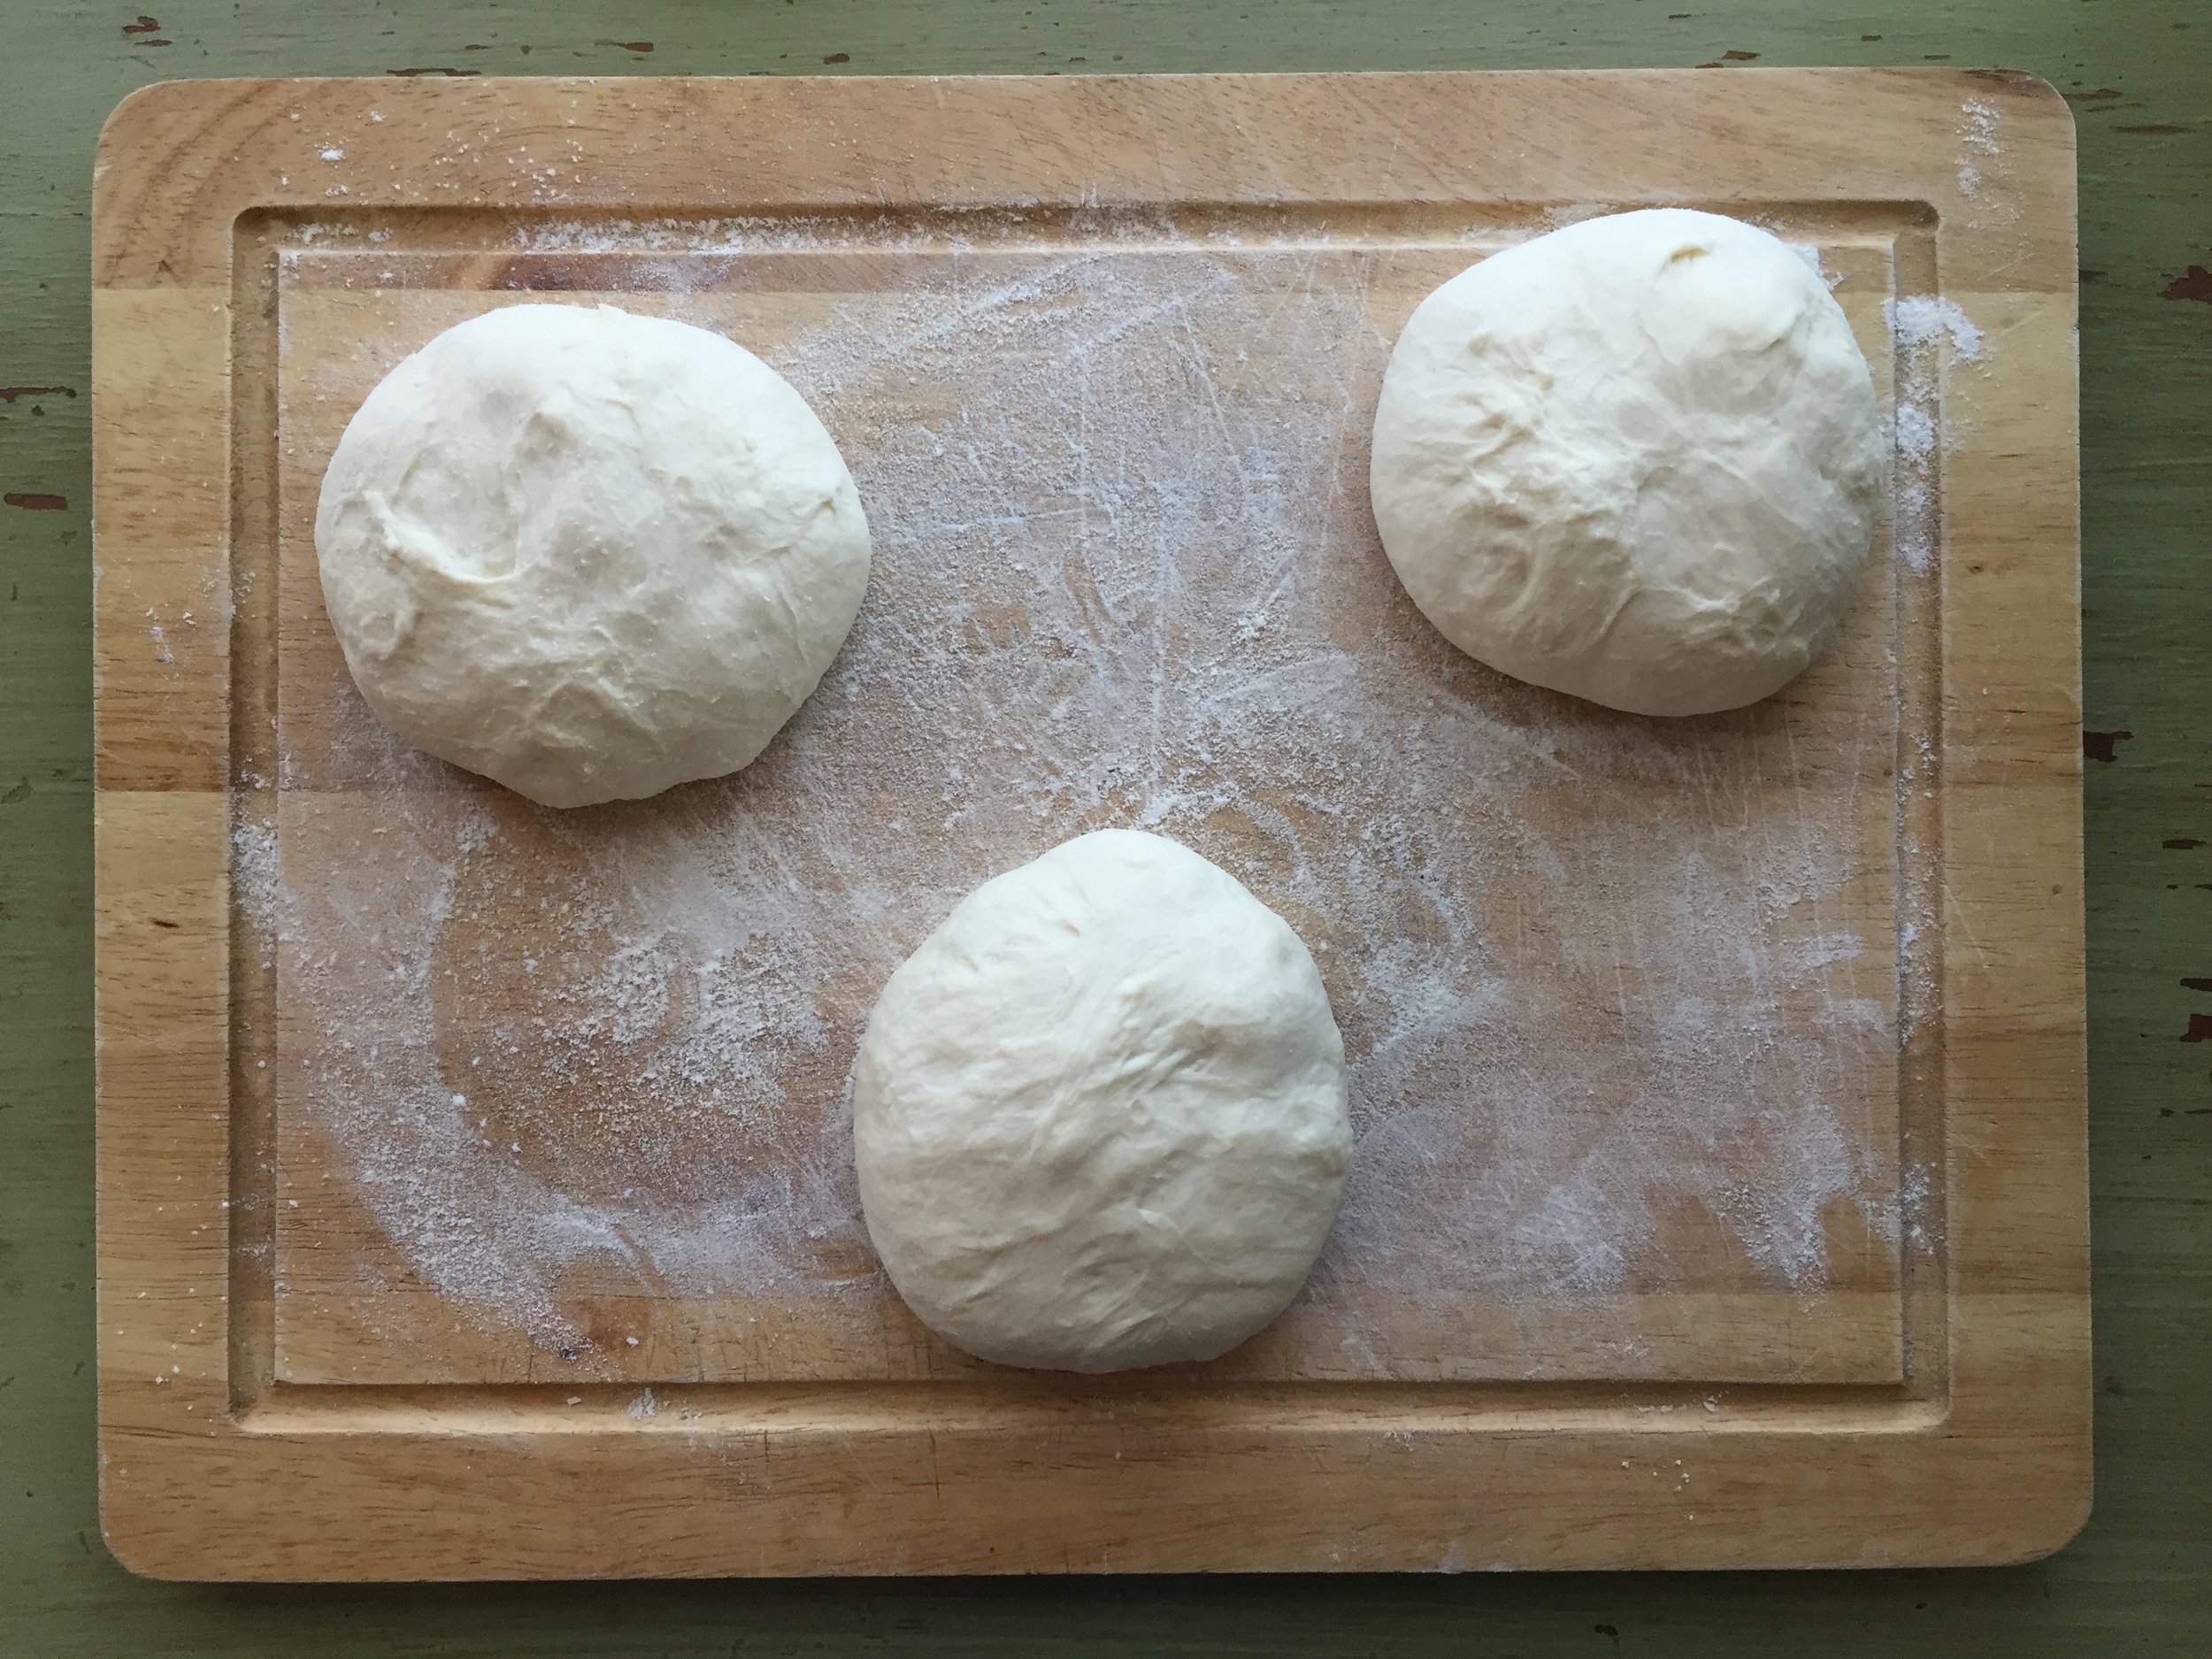
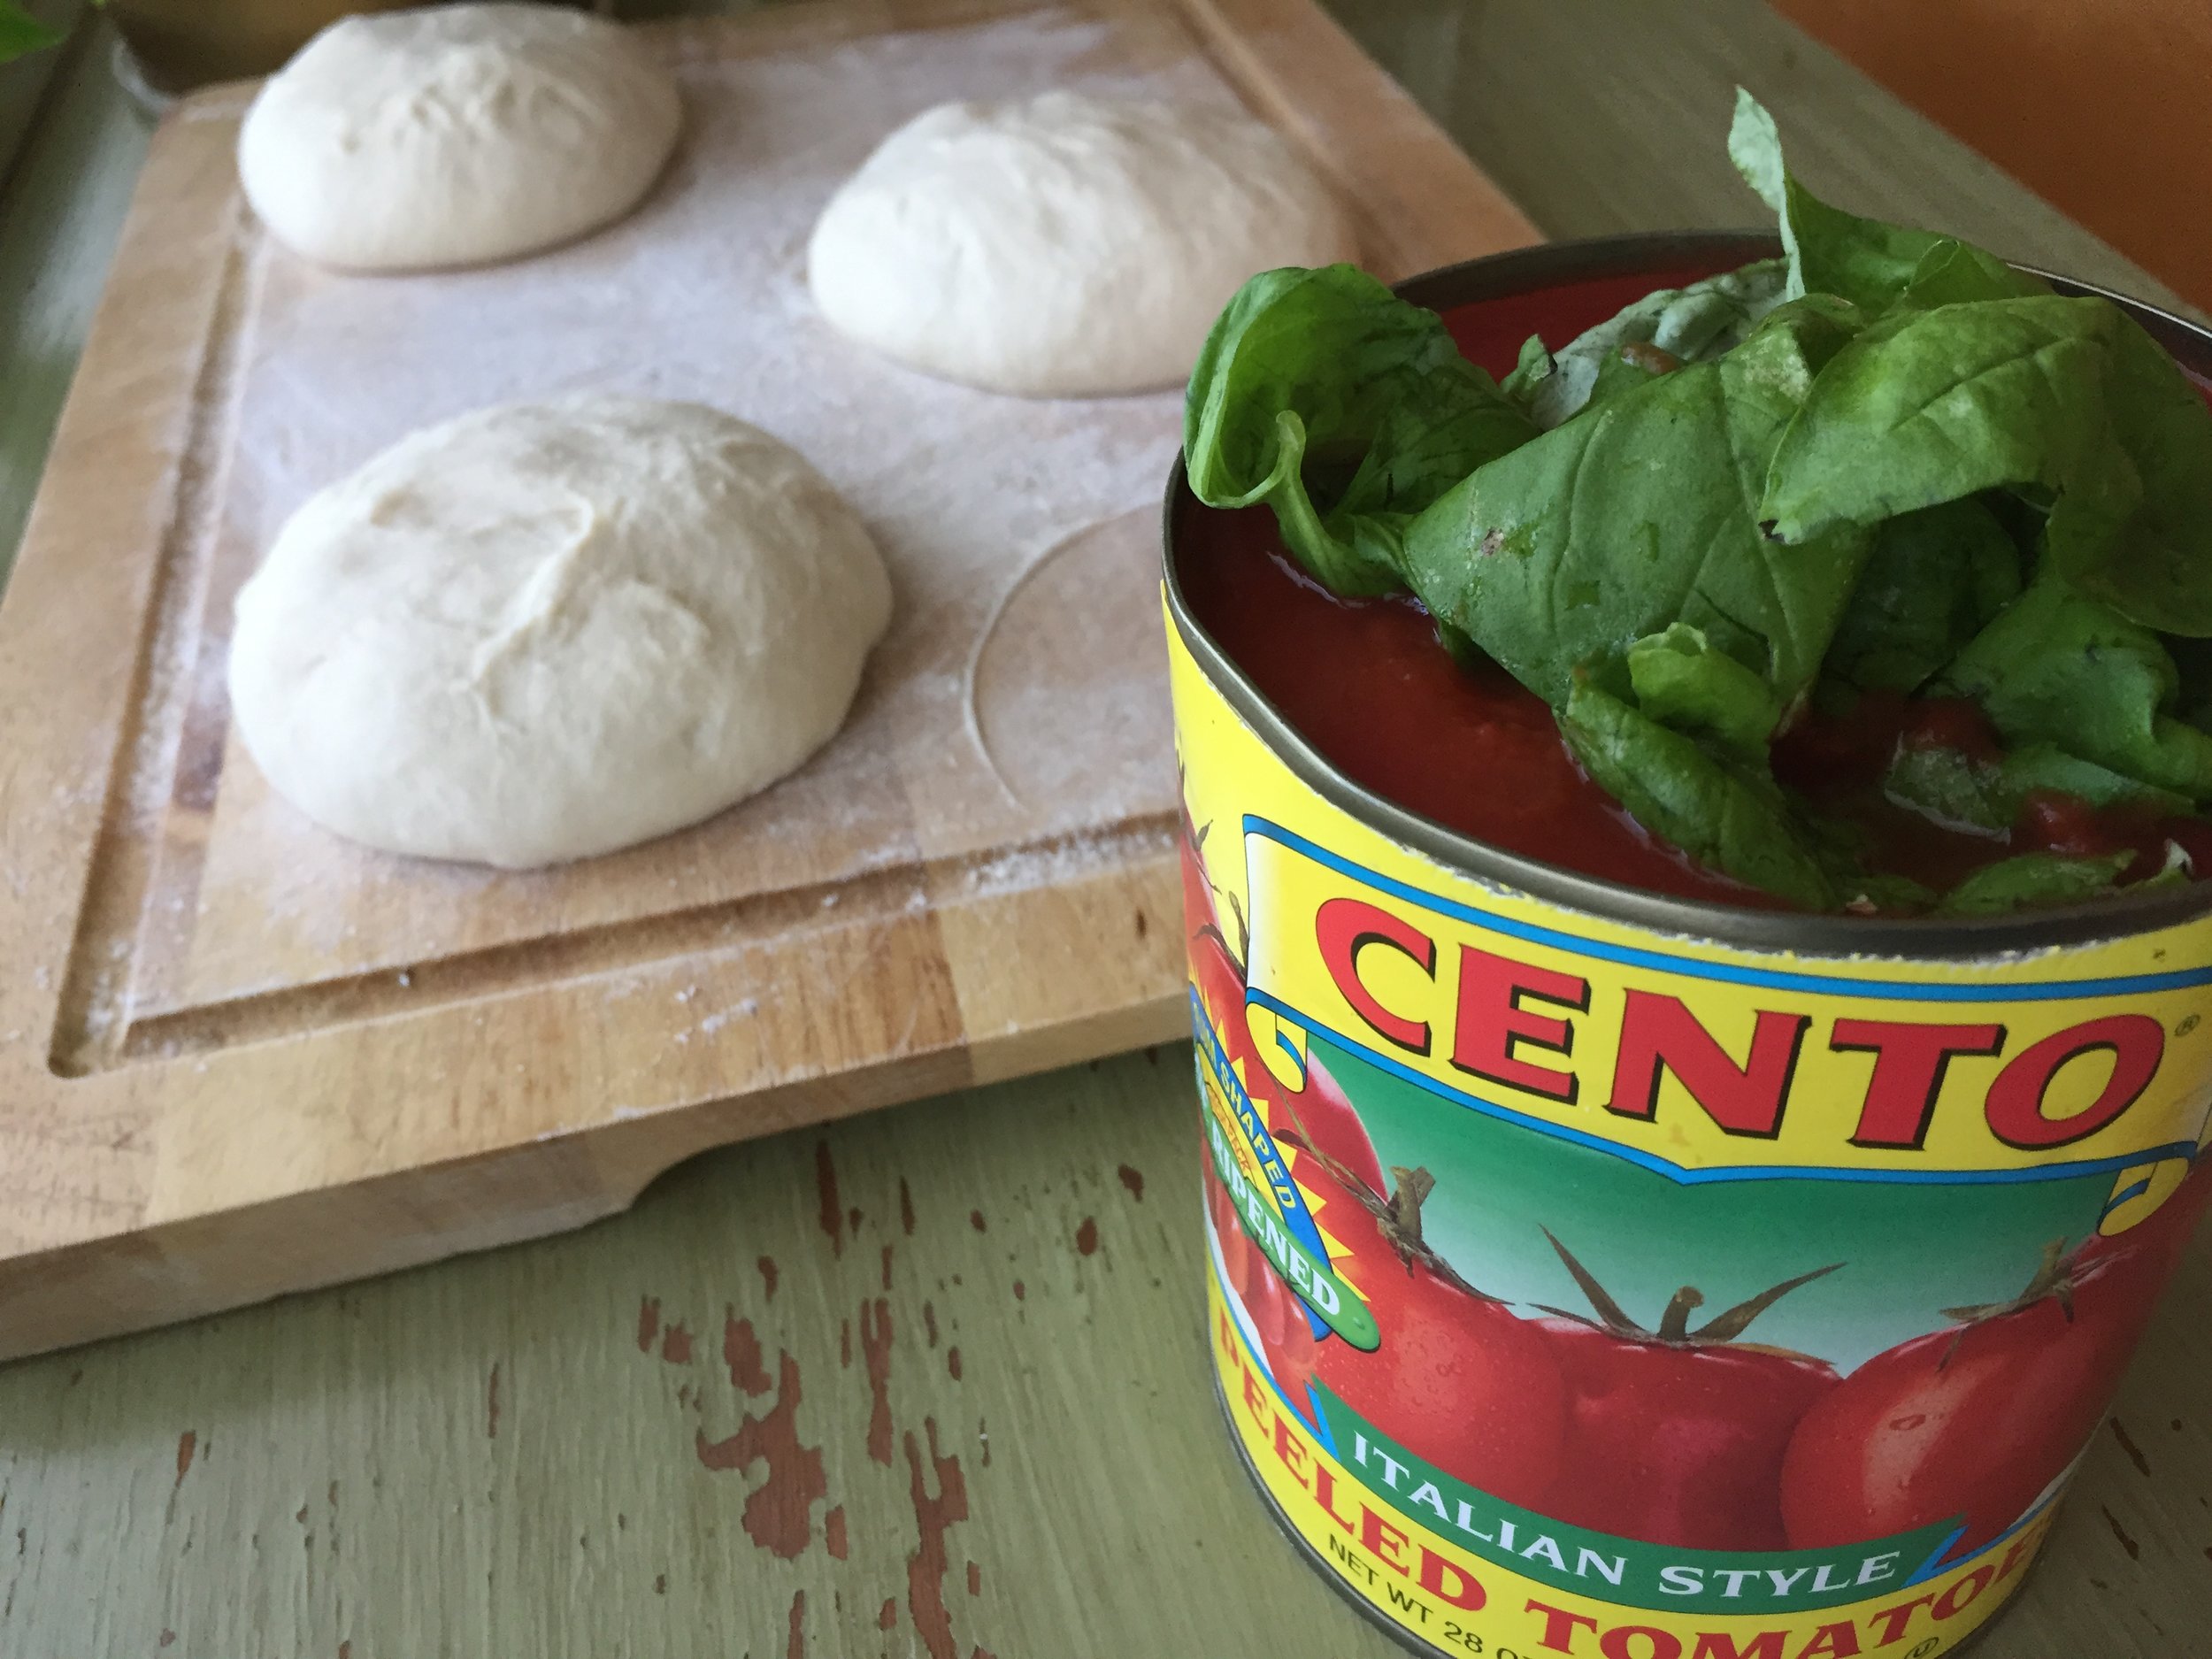
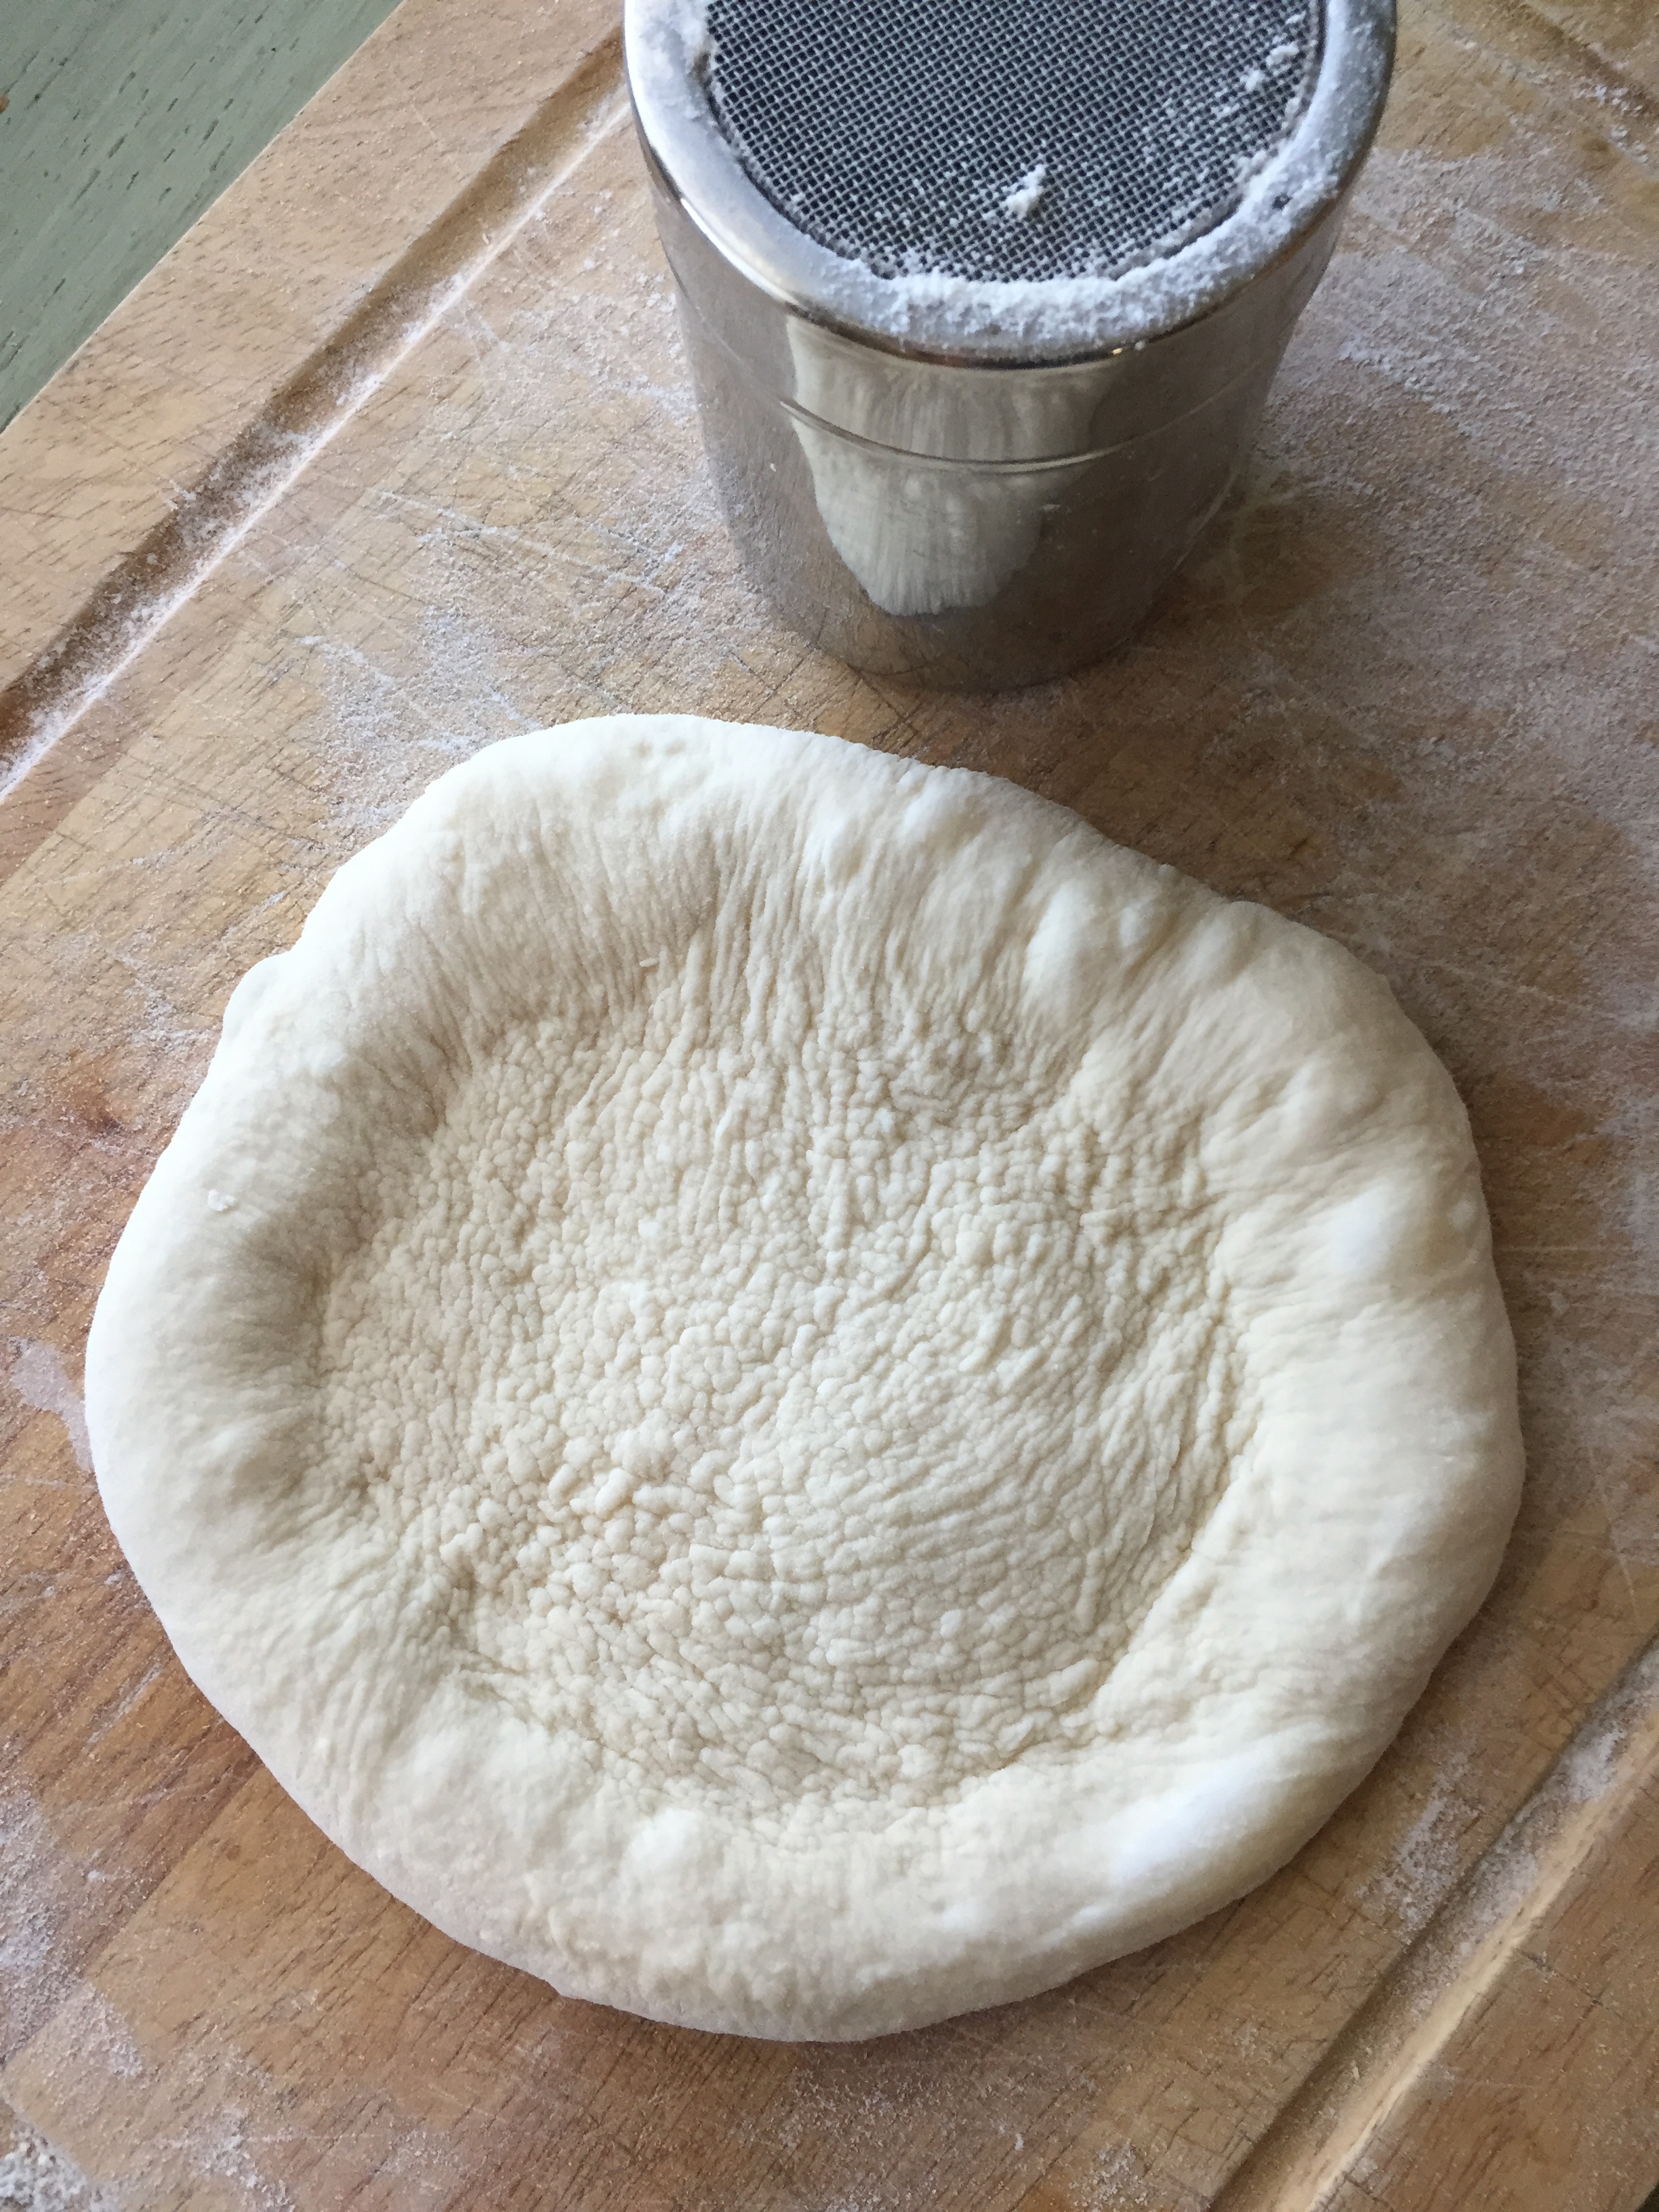
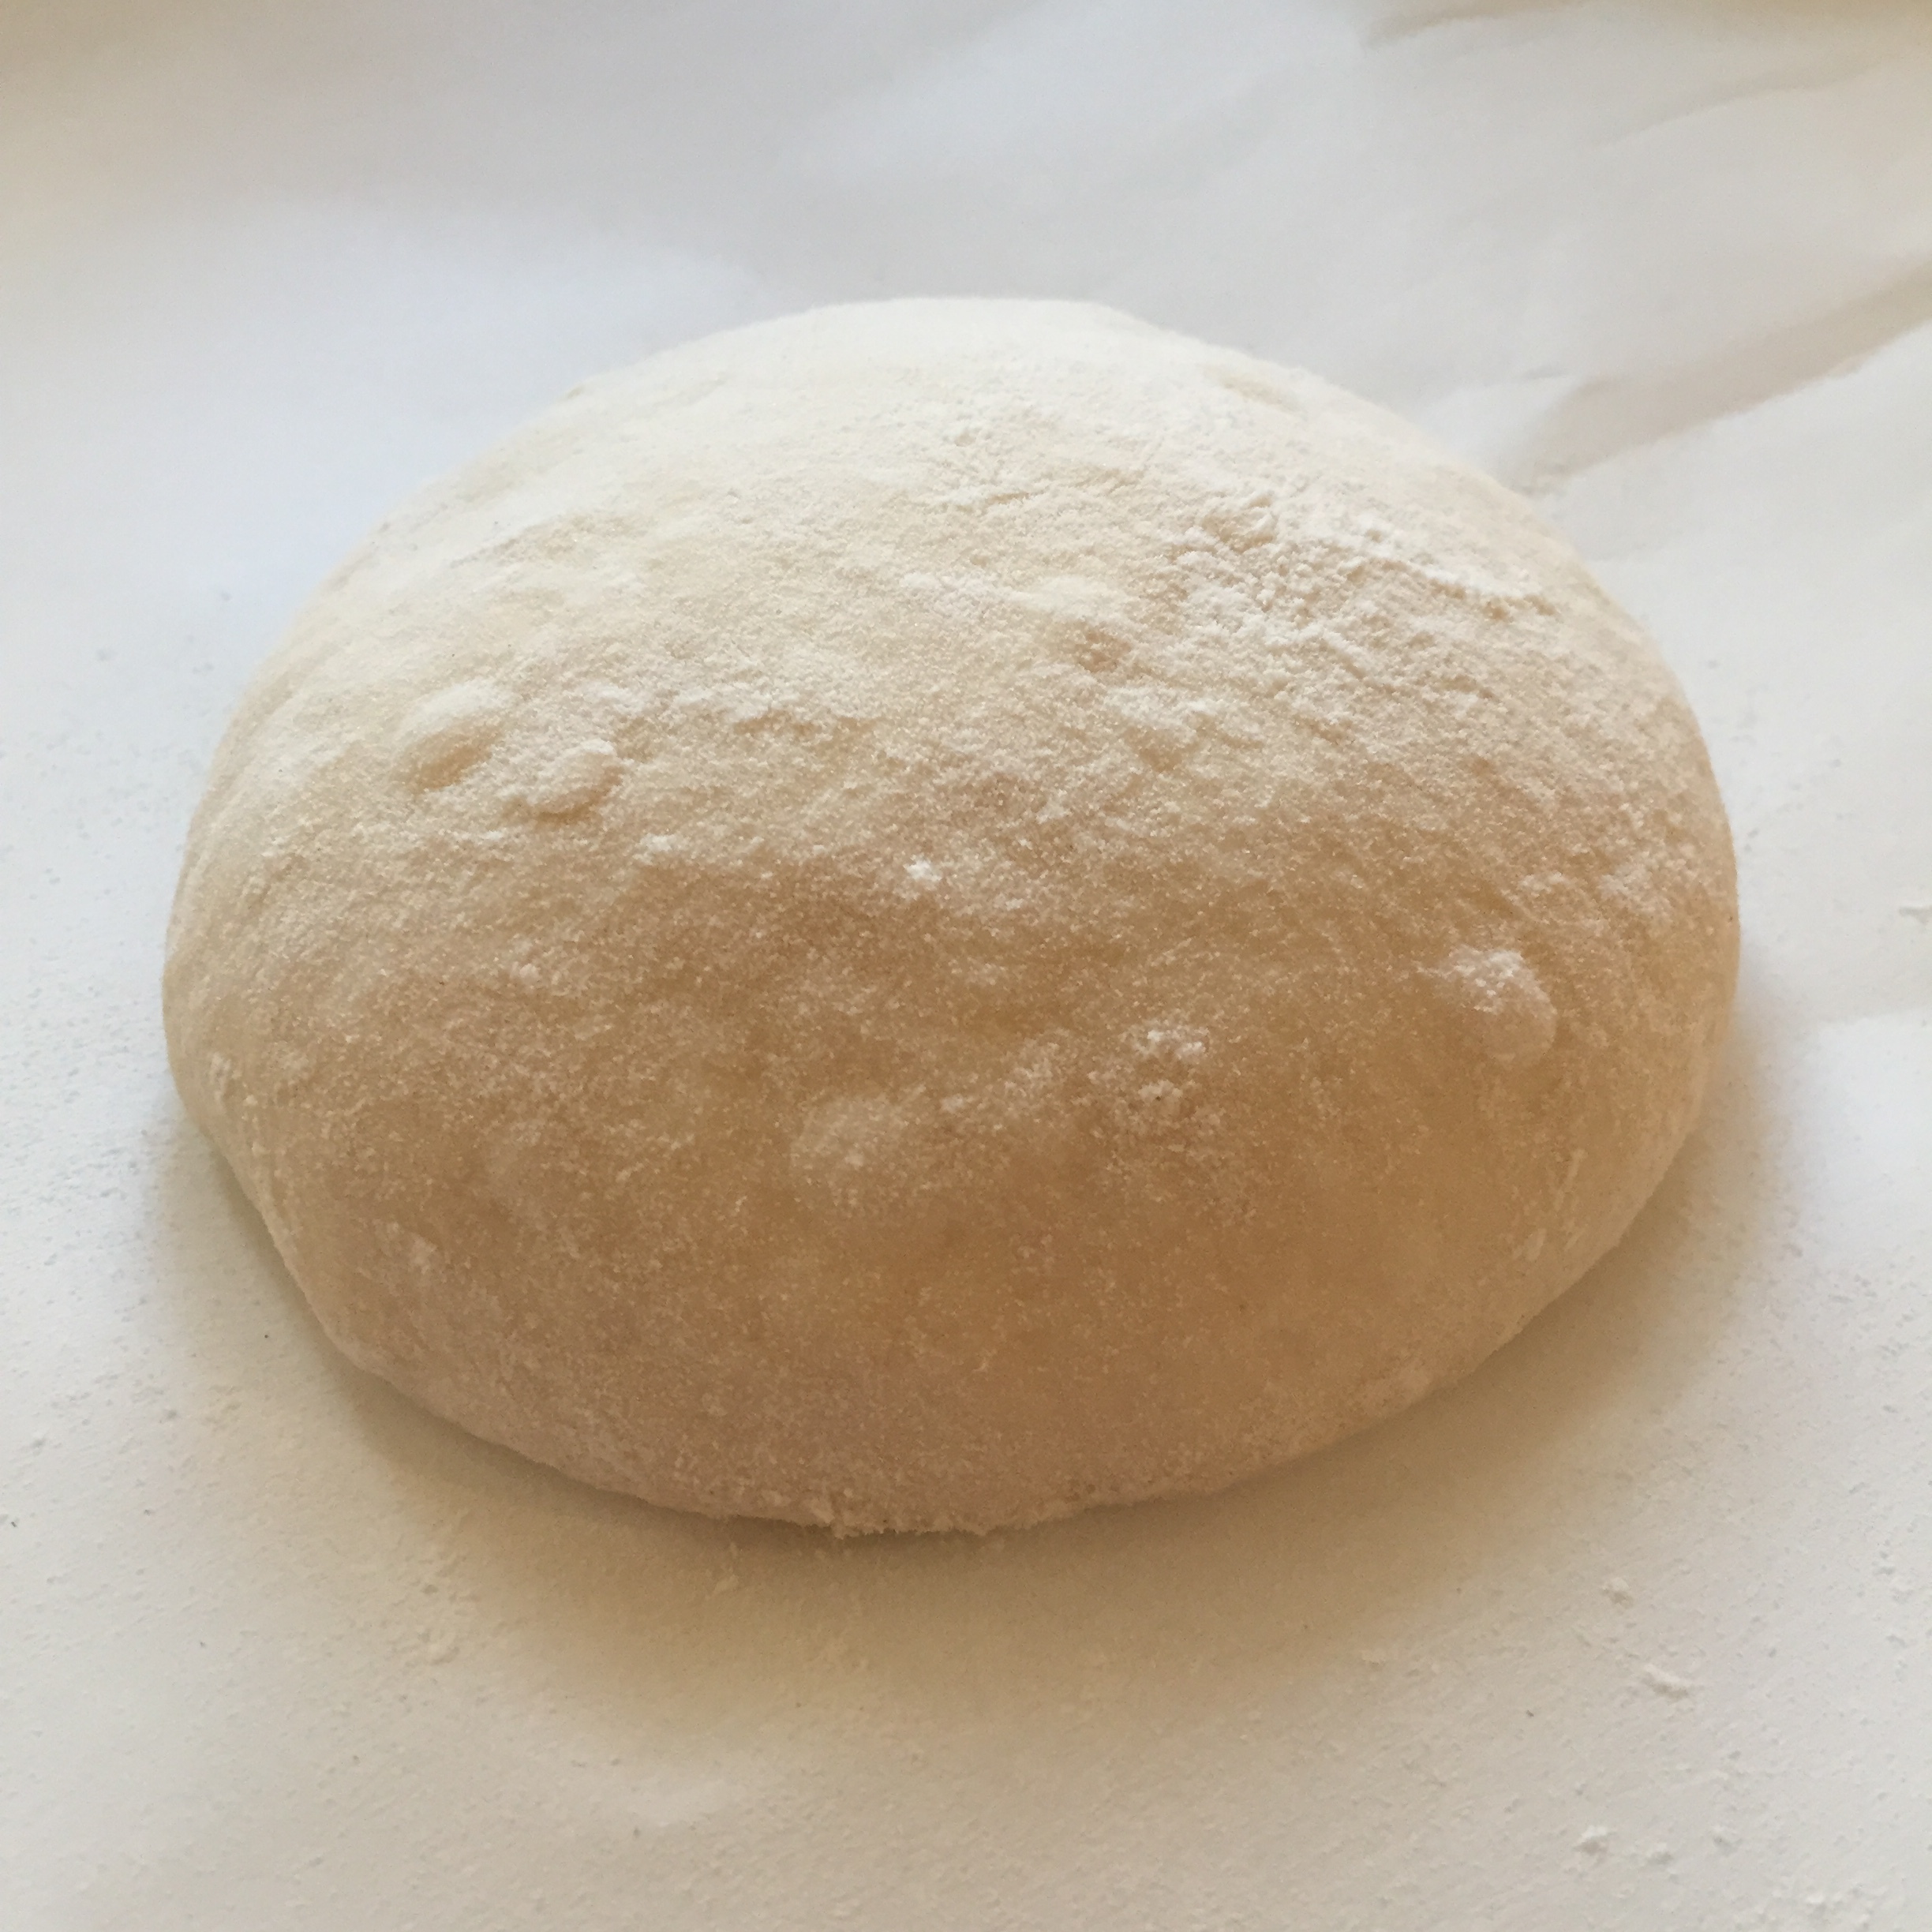
Divide the dough into 275-290 gram portions and ball up the dough. When balling up the dough, use as little dusting flour as possible and use the bench to create the surface tension in the dough ball and pitch up the seams.
Place the individual dough balls seam side down and let them relax in a lightly greased and covered containers for 30 minutes at room temp.
Transfer containers with dough balls to fridge for 6-24 hours. (If baking on the same day, omit the fridge and let the dough balls rise for an additional 3-6 hours at room). On bake day, take the dough balls out of the fridge and let them proof at room temp for 4-8 hours. The dough will rise and become puffy, filled with air.
Admire your dough balls and smile.
Preheat the oven! One hour before pizza time, preheat your Baking Steel or stone for one hour at 550 or at the highest your oven will go. I put the steel about 6 inches from the top broiler.
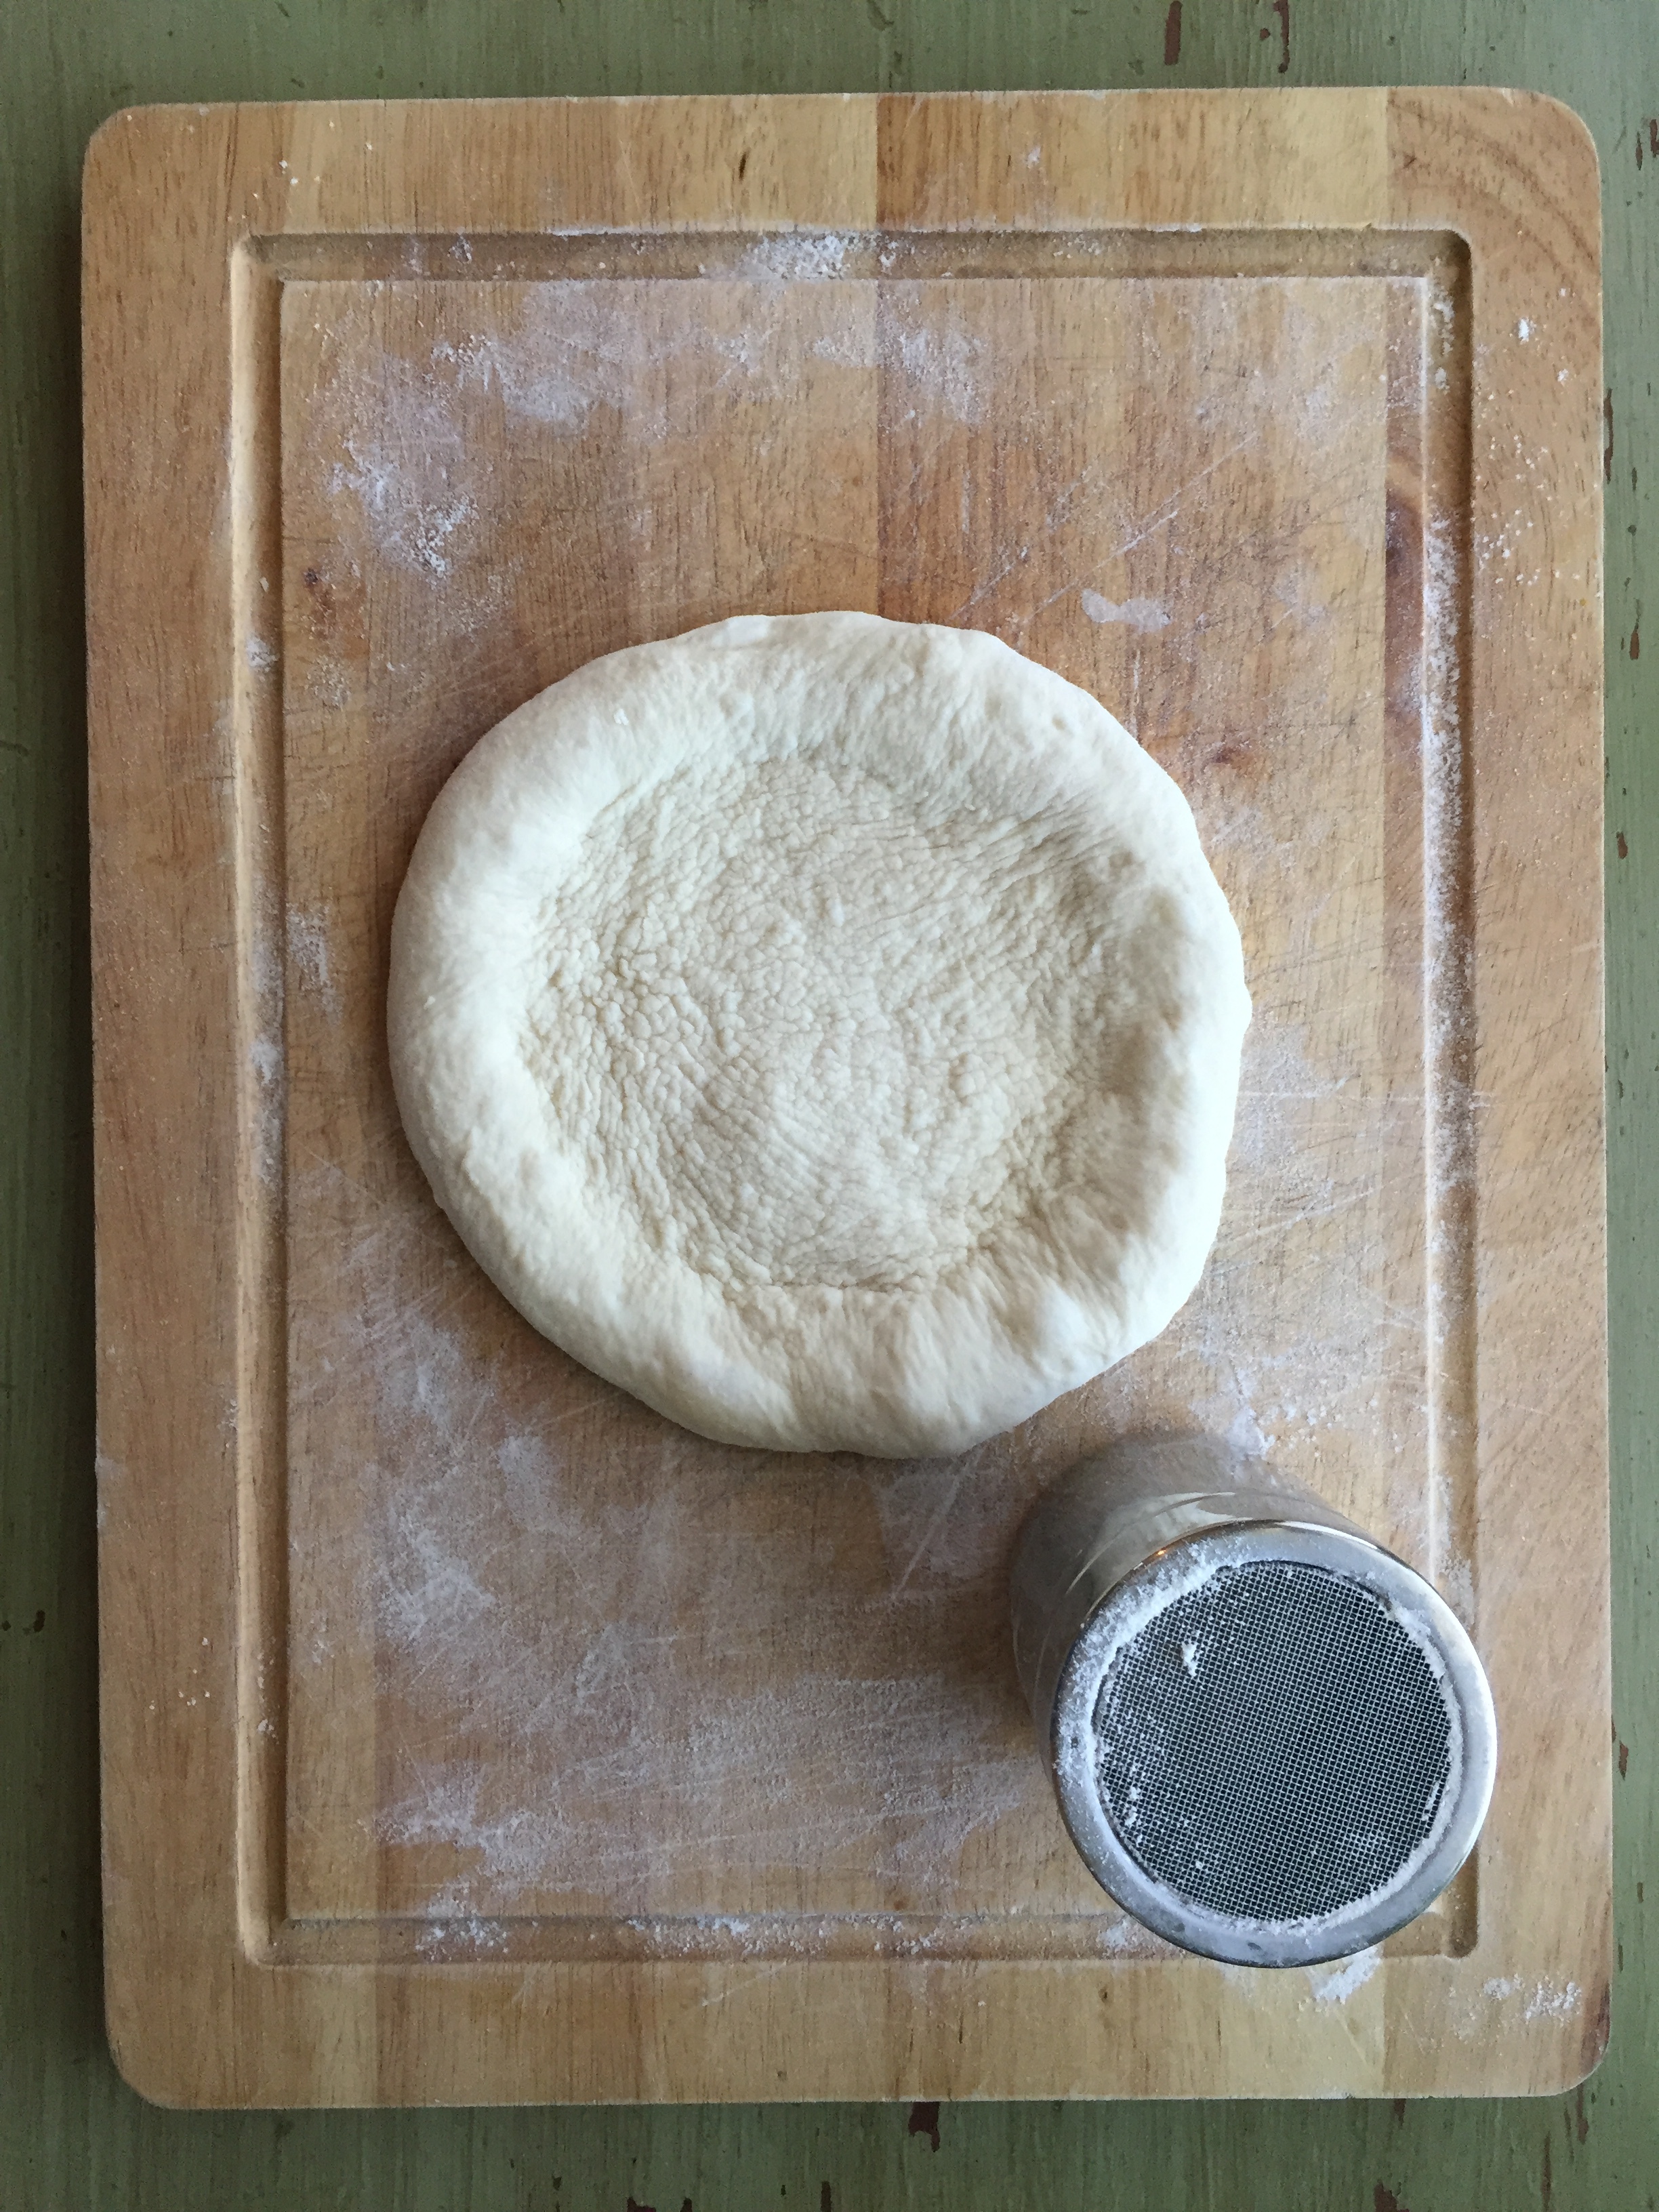
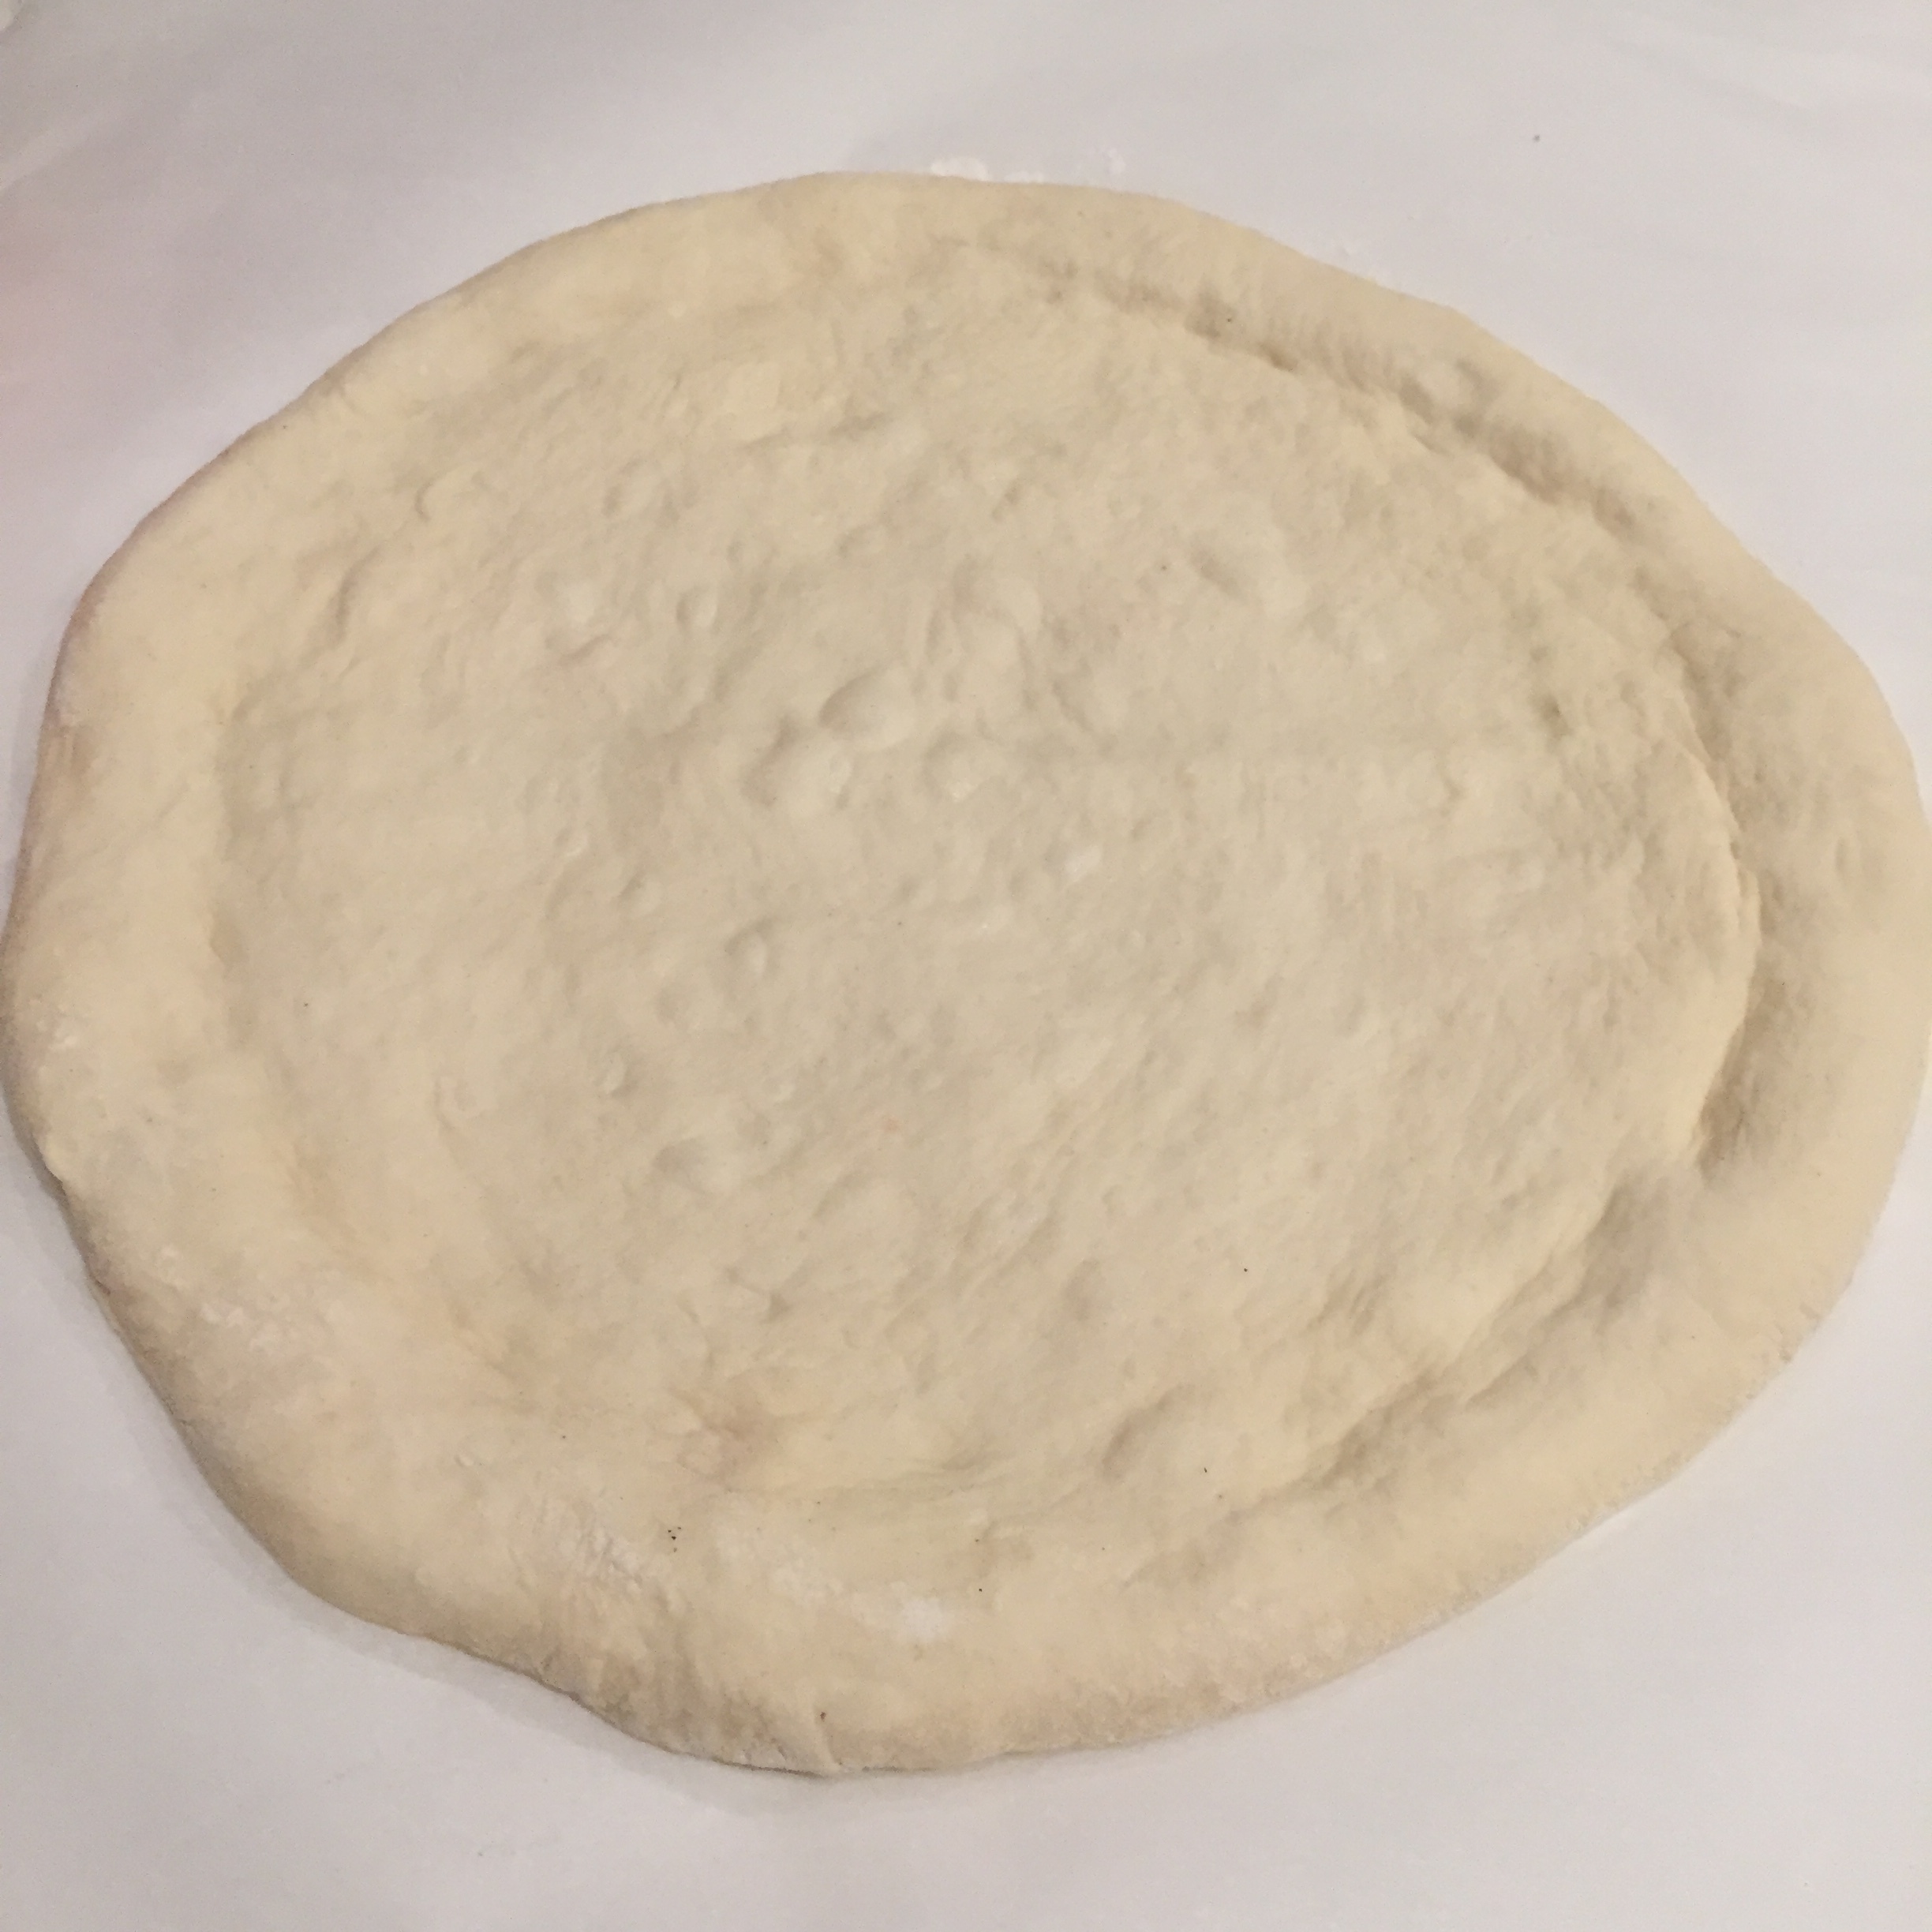
While the oven is preheating, prep your toppings and watch Youtube/Instagram videos on how to stretch dough by hand (no rolling pins! 😊). Just remember that it doesn’t have to be perfectly round! It will be still delicious regardless of symmetry!
Get nervous (just kidding but we all do!)
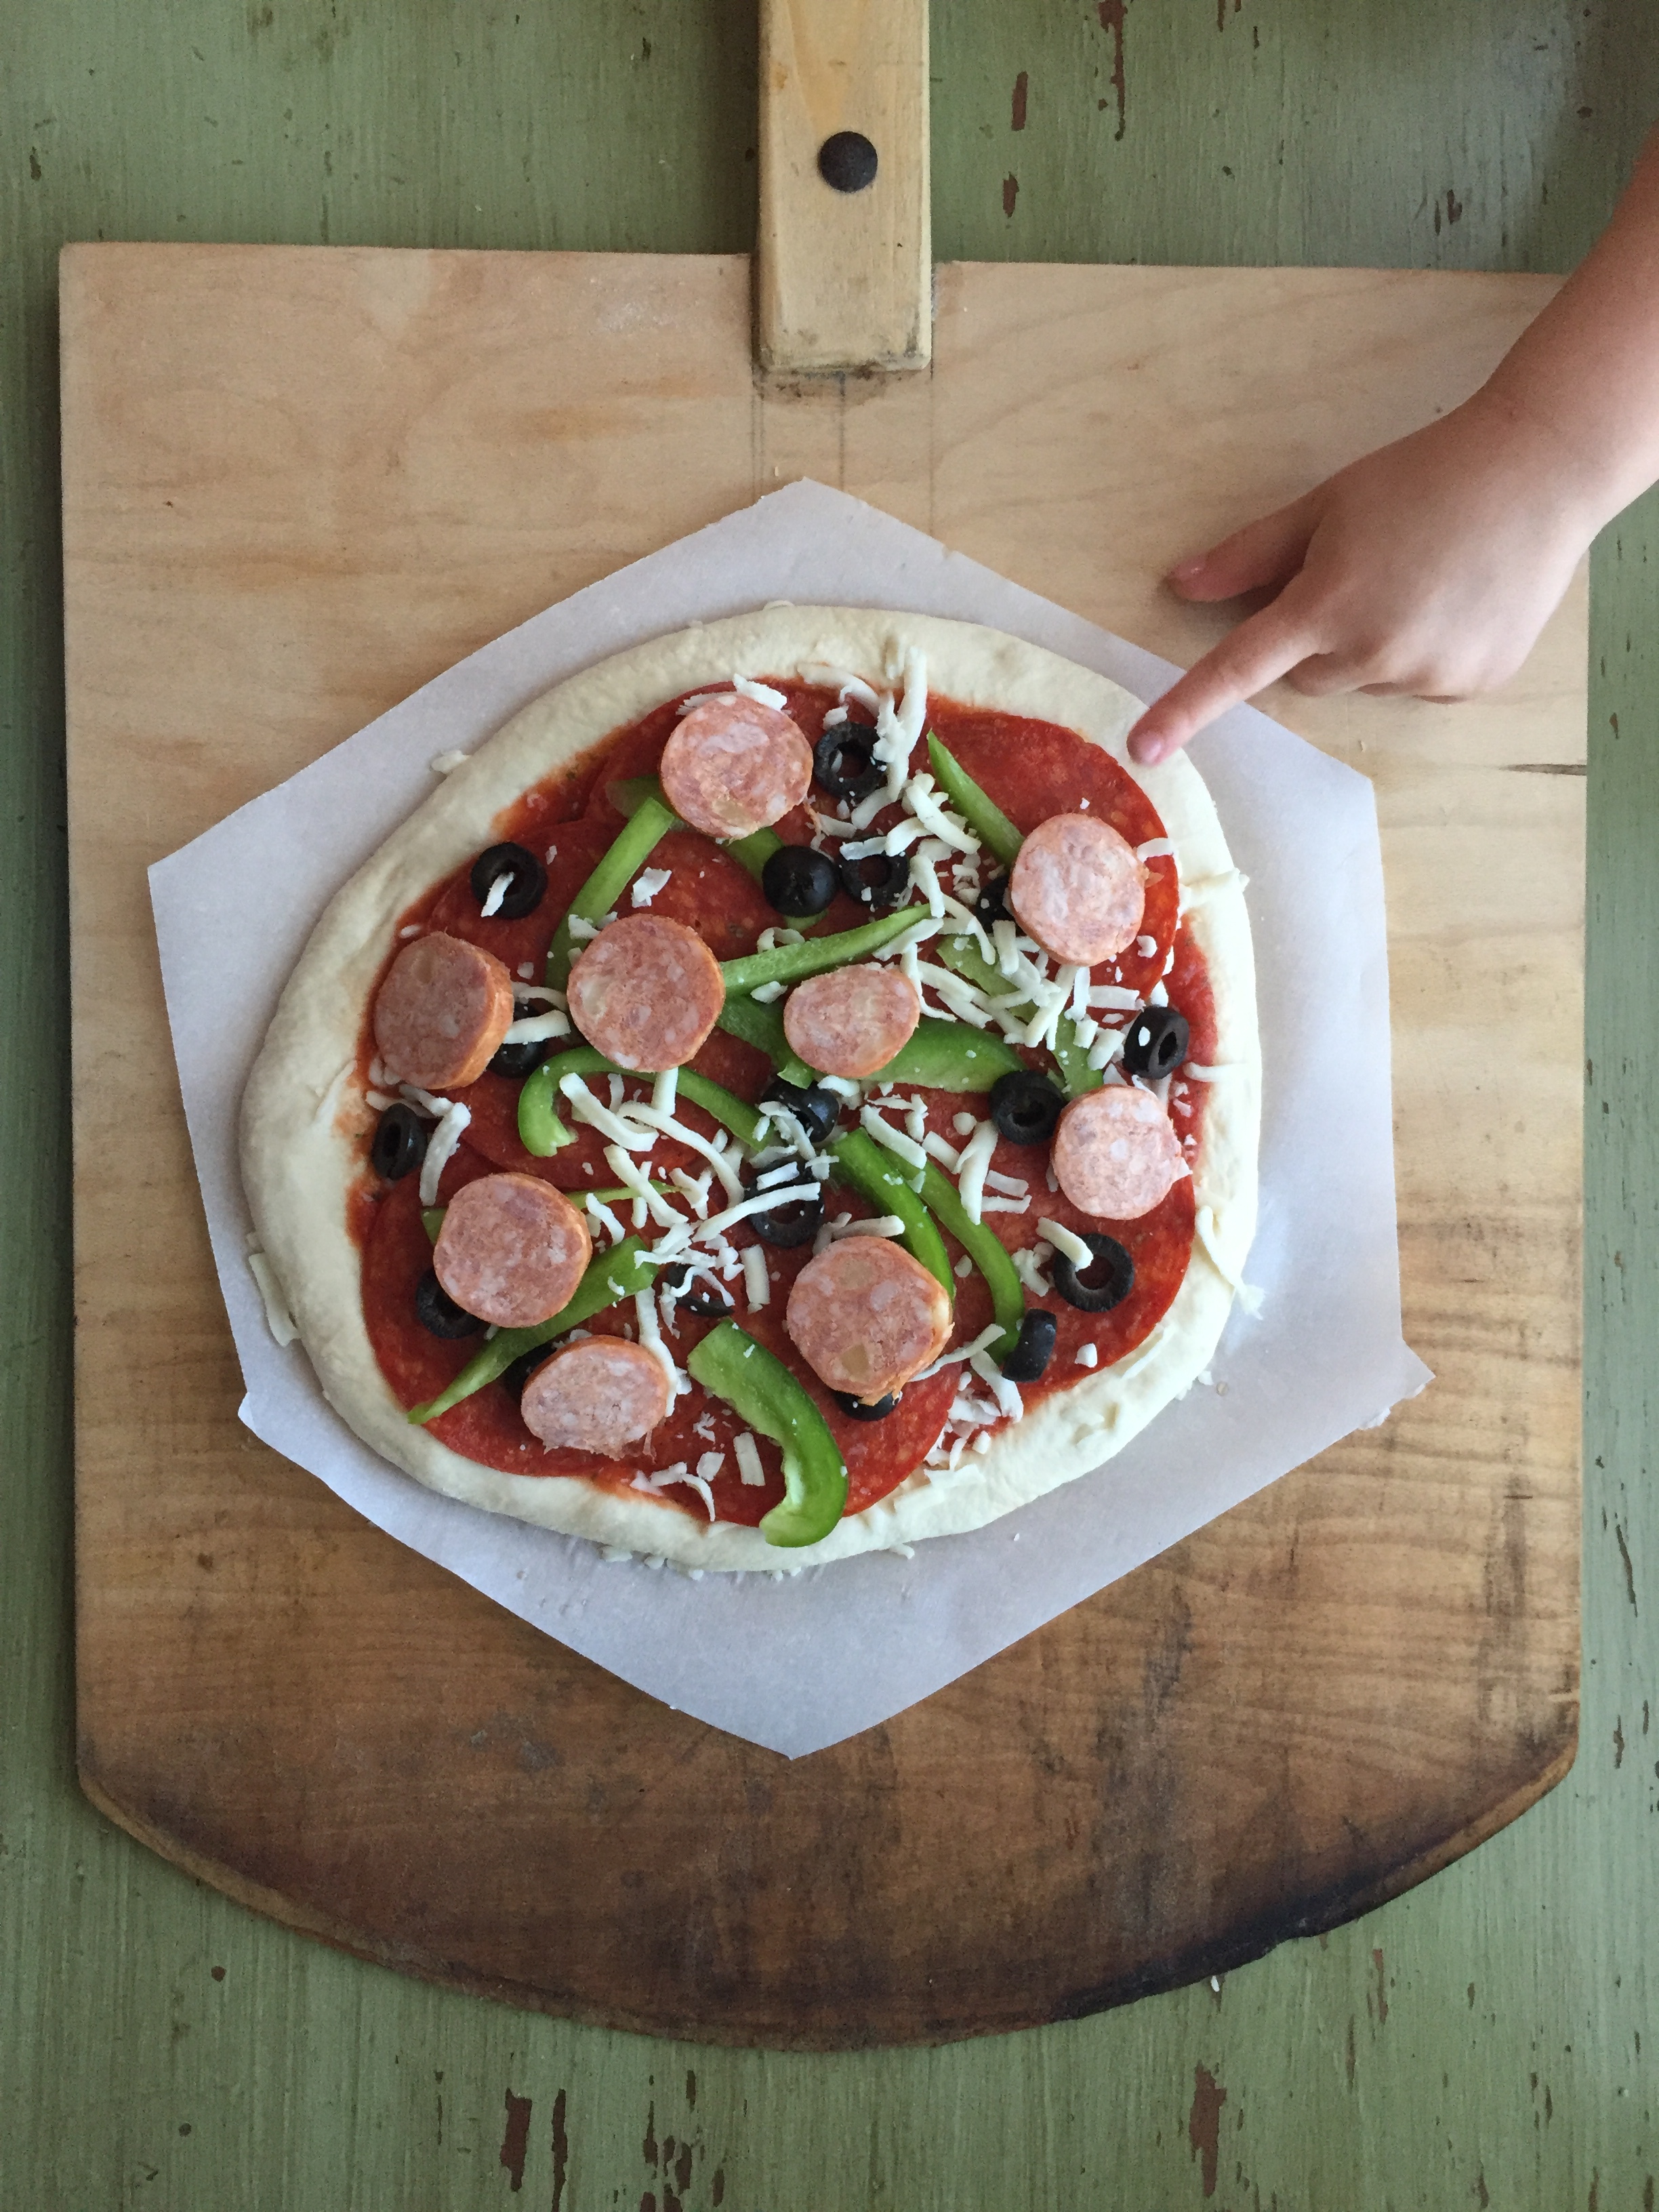
Dust the dough liberally with flour so that the dough won’t stick to your hands or the surface when you are stretching the dough. Dust your hands too. You can shake off all that excess flour once it’s stretched out (Excess flour makes the pizza chalky and or bitter- say no to excess flour). Once it’s stretched out you can place the dough on a floured pizza peel or parchment and then add your toppings.
Bake that pizza! Before you launch your pizza onto the steel/stone, engage your broiler. Make sure it’s glowing red. I use the broiler-first baking method which sees the broiler shooting down top heat to get the pizza top for 1-2 minutes (keep an eye on the pizza or it can burn quickly). This initial broil gets the top of the pizza baking quickly, helping develop that beautiful crust. After the initial broil, switch to regular bake to finish off the pizza. Your time may vary but the total bake time (including the broil at the beginning) is anywhere from 4-8 minutes depending on your toppings and the dough thickness. Just keep an eye on it while it’s baking.
Let the finished pizza cool on a wire rack for a couple of minutes before slicing. I can already see you smiling!
Take a few photos for the memories and enjoy that slice.
Make the next pizza!
Recipe used with permission by Chris Lem. March 3, 2021.

Full Proof Baking - Sourdough Sandwich Bread
By Kristen Dennis
This bread is soft and lightly sweet and buttery. See videos showcasing each part of the method here. You can use a mixer to knead the dough, or you can knead by hand if you’re feeling truly 1950’s. Briefly: the recipe involves building levain overnight, and then mixing your dough the following morning. Let the dough rest several hours until it becomes slightly puffed, then shape and let it final proof! Bake, cool, slice, and enjoy!
Your recipe will depend on your pan size.
Make 1X the recipe for one 13x4x4” Pullman pan.
Make 0.87X the recipe for one 9x5x5” pan.
Make 0.74X the recipe for one 8.5x4.5x4.5” pan.
Sourdough starter: Be sure to fully activate your starter ahead of time so that it isn’t carrying a lot of acid or sour tanginess. I build mine the night before at a ratio of 1:5:5 (14g active starter + 70g flour + 70g water), and let it rest all night around 75-78F ~10 hours until fully peaked. You can alternatively build your levain in the early morning (recommended 1:1:1), and wait the 4-6 hours until it peaks and begin mixing the sandwich dough early afternoon.
Water: Regular tap water is fine. Try to make sure the water isn’t super cold or super hot.
Flour: You can actually use your favorite flour mix, but I personally love a mix of King Arthur all-purpose flour and bolted wheat flour by Meadowlark Organics.
Sugar: You can use granulated sugar, brown sugar, or caster sugar - they all work interchangeably for this recipe, though I personally prefer brown sugar.
Milk Powder: I use non-fat milk powder by Carnation brand. You can omit the milk powder, or substitute ⅓ of the water called for in the recipe for skim milk.
Salt: I use Real Sea Salt (by Redmond).
Butter: I use room temperature, softened unsalted butter - and it really doesn’t matter what brand you go with. The Organic Valley Cultured butter is going to taste the best… but I tend to use Land O Lakes (it’s much less expensive and easier to find).
Weight (grams)
150g
360g
575g (375g all purpose flour + 200g bolted wheat flour)
50g
25g
12.5g
55g
Ingredients
Sourdough starter
Water
Flour
Sugar
Milk Powder (optional)
Salt
Butter
Method:
Before bed:
Prepare levain by mixing 14g active starter + 70g flour + 70g water, and let it rest overnight around 75-78F ~10 hours until fully peaked.
Next day:
Measure out the butter and allow to come to room temperature out on the counter (takes approximately 45 minutes).
In the bowl of a stand mixer, combine peaked levain, water, and flour.
Knead with the dough hook for 5-8 minutes until thoroughly mixed. Cover and let rest in the mixer bowl about 30-45 minutes, covered.
Add to the bowl the salt, sugar, and milk powder, and knead with the dough hook another 5-8 minutes until well-mixed.
A pat at a time, add the softened butter while the dough hook kneads the dough. Continue kneading a total of about 8 minutes until all the butter is incorporated.
Tip the dough out of the bowl and into a clean bowl or flat Pyrex 8x8” dish. Cover and let rest 1 hour around 78F.
Perform a coil fold on the dough to add strength and redistribute the heat. Cover and let rest another 3 hours around 78F.
Liberally flour your countertop and tip the dough out. Lightly degas and shape as an elongated batard and transfer to your parchment-lined sandwich tin. Cover, and proof until the dough has risen just above the rim of the tin (at 78F, this takes me around 5 hours).
Preheat the oven for 30 minutes to 425F.
Used with permission by Kristen Dennis. January 28th, 2021.
Ramen Noodles from Sourdough Every Day by Hannah Dela Cruz

Ramen Noodles
Once you’ve eaten homemade ramen noodles, you’ll be utterly spoiled. And because they are so easy to make, you may never buy ramen again. These ramen noodles get their chew from bread flour and the addition of baked baking soda to the dough. You can make a large batch of baked baking soda in advance and use it whenever you want fresh ramen.
One Day Recipe
Serves 2 to 4
Baked Baking Soda
60 grams (½ cup) Baking Soda
Dough
113 grams (½ cup) Sourdough Discard
56 grams (¼ cup) Hot Water
4 grams (½ teaspoon) Salt
7 grams (2 teaspoons) Baked Baking Soda
180 grams (1 ½ cup) Bread Flour
Cornstarch for dusting
To bake the baking soda, preheat your oven to 250 F(121 C). Spread baking soda on a baking sheet, and bake for 1 hour. Allow the baking soda to cool completely and store in an airtight container until ready for use.
To make the dough, add baked baking soda and salt in the hot water.
In a large bowl, combine the flour and sourdough discard, and stir to incorporate. Add baking soda mixture into the flour and knead until fully combined, about 5 minutes. Wrap the dough in plastic wrap and allow it to rest for 30 minutes for the flour to absorb all of the water in the dough.
Knead the dough for another 10 minutes. Divide the dough into two portions, shape into a log and wrap with plastic. Allow the dough to relax for 1 hour before rolling out, this will allow the gluten to relax and make it easier to handle. You can refrigerate the uncut dough for up to 24 hours, the dough may experience some discoloration.
Once you’re ready to cut your noodles, sprinkle a generous amount of cornstarch on a baking sheet and set it aside. Working with one portion at a time, flatten the logs using a rolling pin until the dough will fit into your pasta machine. The dough may break apart the first time you run it through your pasta machine, that’s ok, fold the dough into thirds and continue rolling it on the widest setting until you end up with a smooth pasta dough.
Used with permission by Hannah Dela Cruz. Recipe from Sourdough Every Day: Your Guide to Using Active and Discard Starter for Artisan Bread, Rolls, Pasta, Sweets and More. By Hannah Dela Cruz. Page Street Publishing Co. December 15, 2020. ISBN: 9781645672029

Hannah’s cookbook Sourdough Every Day now available!
Sesame + Spelt Sourdough Loaf from Betsy Gonzalez, Osono Bread
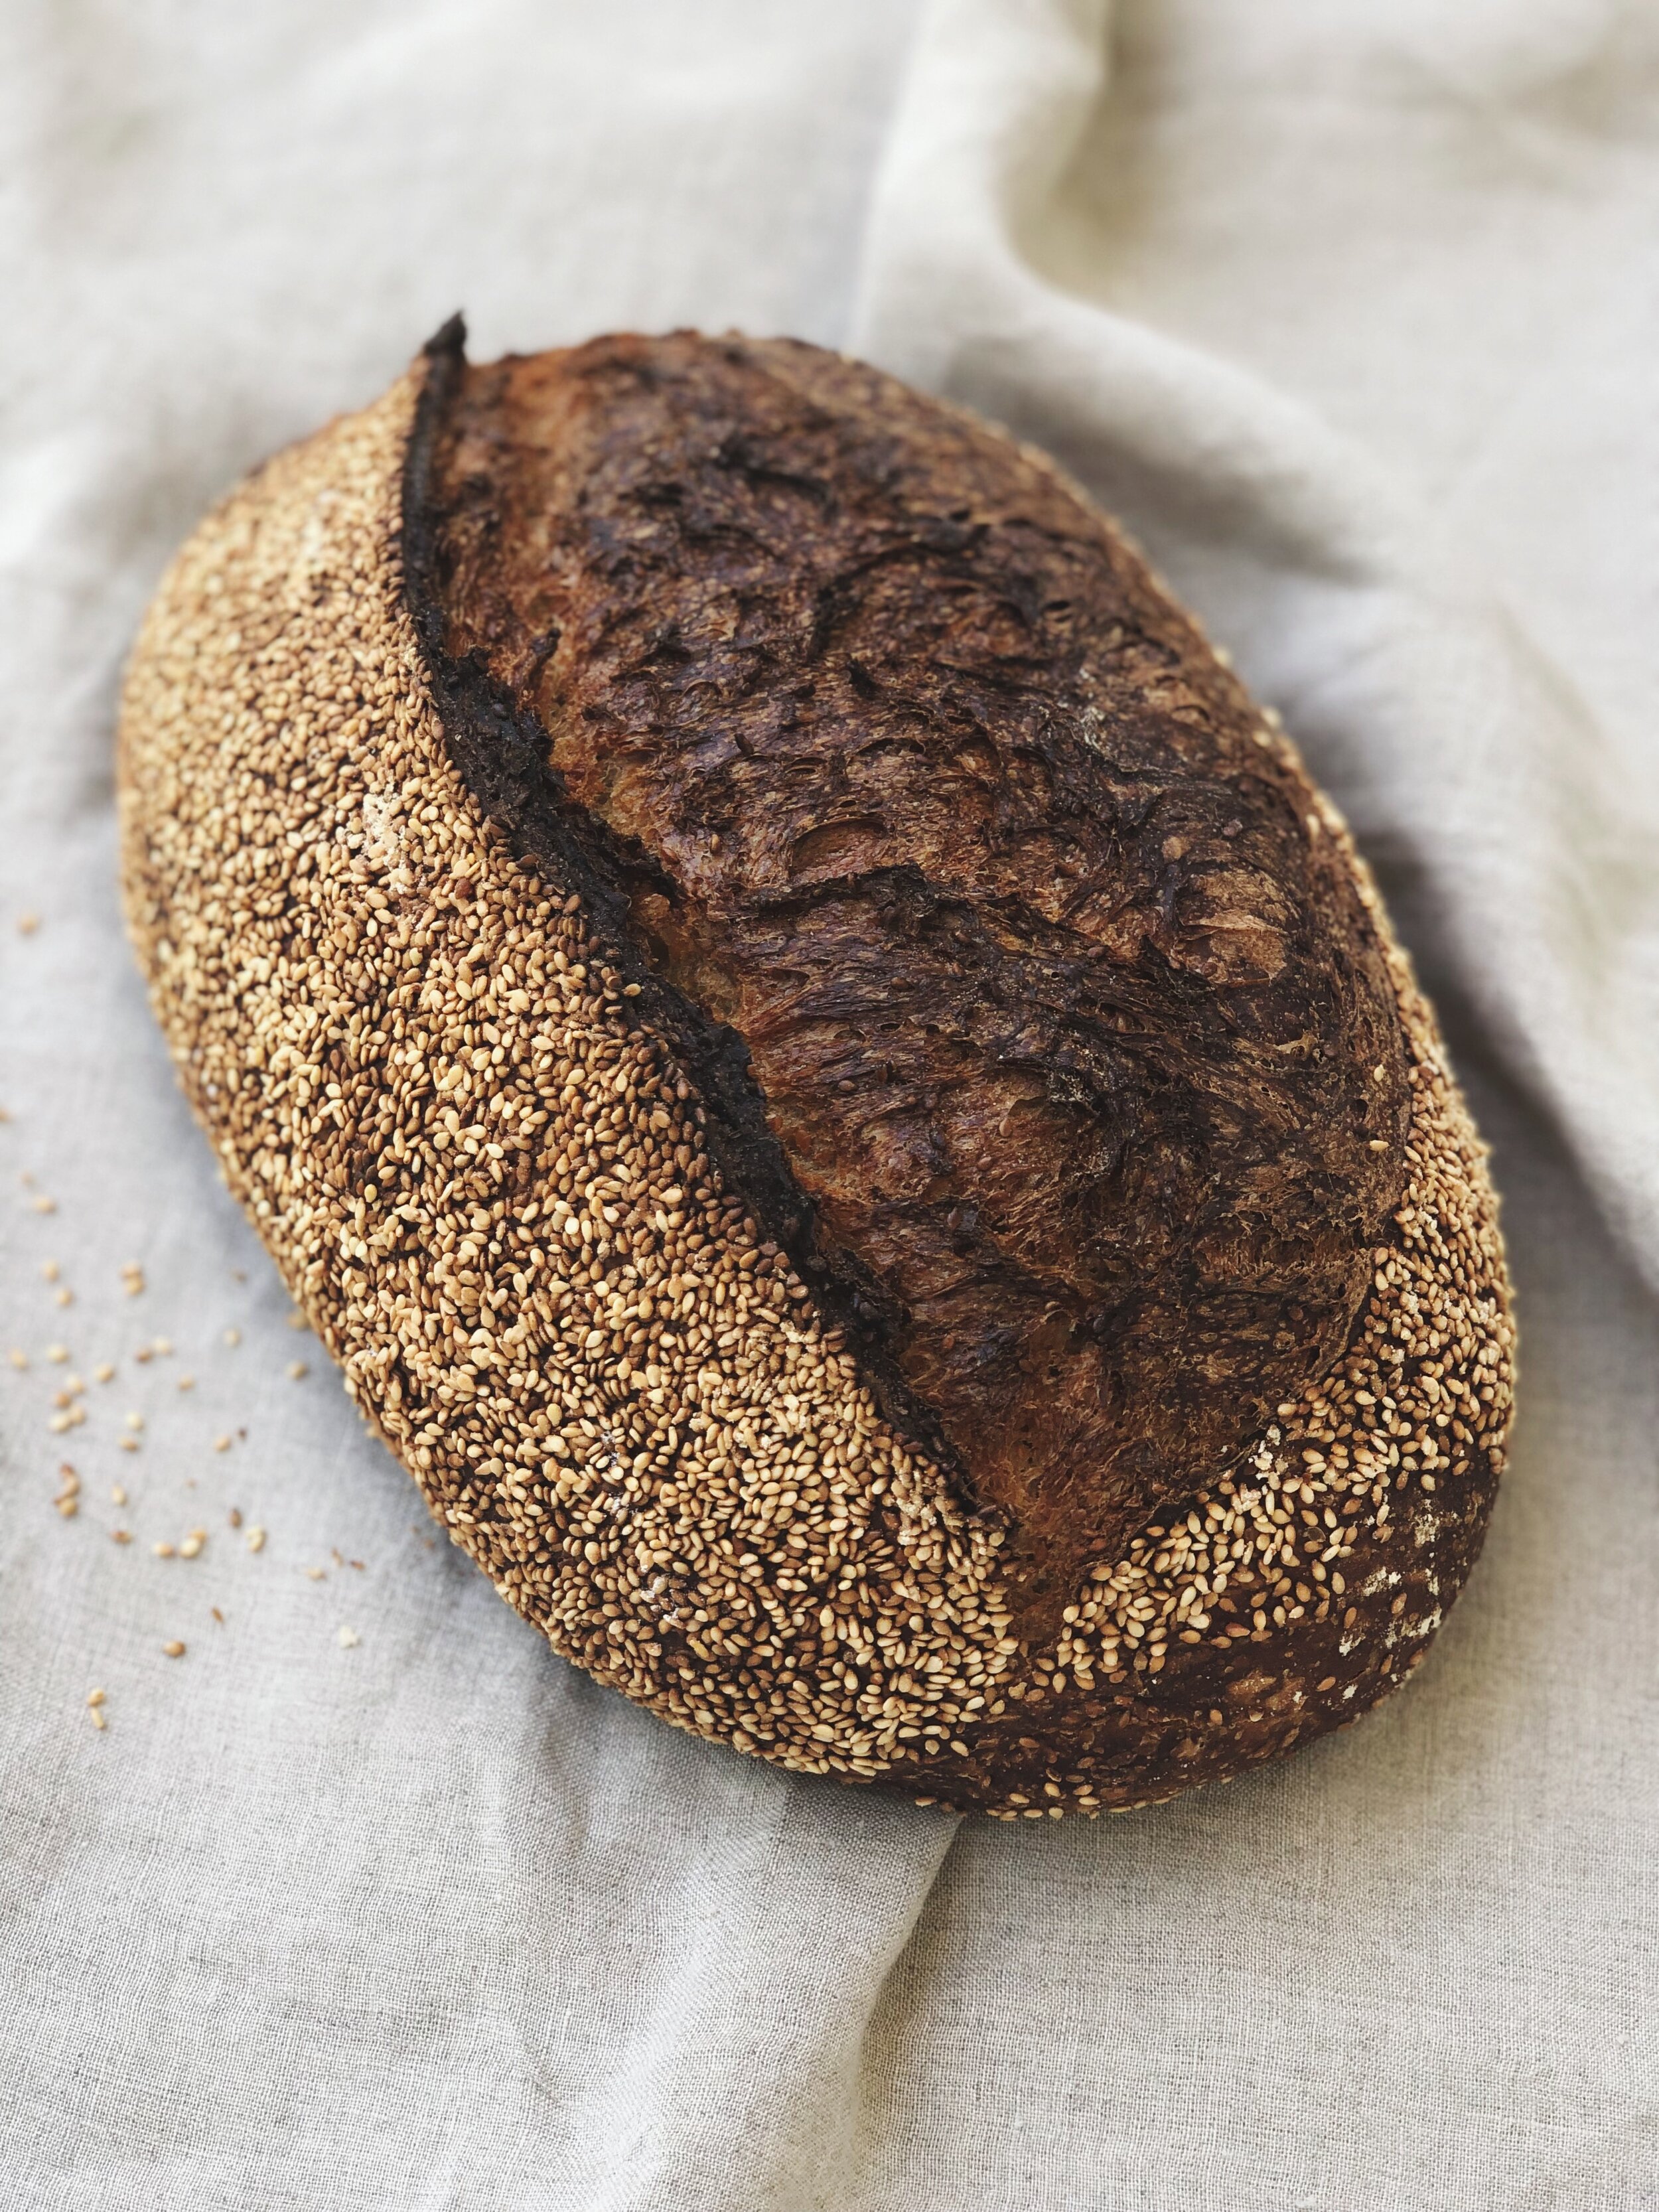
Sesame + Spelt Sourdough Loaf
Used with permission by Betsy Gonzalez, www.osonobread.com.
Yield: (2) 1kg loaves | Total Dough Weight: 2000 grams
With Carolina Ground whole spelt flour, toasted sesame seeds, and a smidge of local Georgia honey, the Sesame + Spelt loaf is nutty, aromatic, and one of our favorites to bake (and eat, of course) at Osono Bread.
Whole Spelt Flour 85% 755 grams
Bread Flour 15% 135 grams
Water 75% 665 grams
Honey 10% 90 grams
Levain (Starter) 18% 160 grams
Sea Salt 2% 17 grams
Sesame Seeds, toasted 20% 178 grams
Sesame Seeds, untoasted for coating
Total Percent 225%
Build your levain
In a small container with a lid, mix 70 grams warm water, 70 grams flour, and 70 grams of mature starter until fully hydrated. Cover and allow to ferment in a warm spot until matured, bubbly, and doubled or tripled in volume (4-6 hours).
Initial Dough Mix
Once your starter has matured, begin your dough mix. Scale water and honey together in a large bowl, and stir to dissolve the honey.
Add flours to water/honey mixture and begin to mix until flours are fully hydrated and no dry bits remain. The dough will be shaggy and not smooth. Autolyse the dough for 15 minutes, covered with a linen.
After completing the autolyse, add 160 grams of levain (the remaining amount is to maintain your starter) and sea salt on top of dough. Mix in levain and sea salt until fully incorporated and the dough is somewhat smooth.
Bulk Fermentation + Stretch and Folds
Cover the dough and allow it to rest for 15 minutes before starting the first stretch and folds (S&F). Complete the first two S&Fs, 15 minutes apart, then gently fold in the toasted sesame seeds. Finish one to two more S&Fs, 30 minutes apart, until the dough feels strong and elastic.
Allow the dough to complete it’s bulk fermentation, covered, in a warm spot (4-6 hours). The dough will transform from stiff to slightly aerated, a few bubbles on the surface, and appears domed around the edges.
Divide, Preshape and Final Shape
After the bulk fermentation has finished, divide the dough into two pieces. Gently preshape the individual pieces rounds (boules) and allow to benchrest, covered.
Once the doughs have relaxed, complete your preferred final shape. Before placing the dough into proofing baskets, coat the exterior with sesame seeds. To coat the dough, lightly spray the surface with water, then roll or toss in sesame seeds.
Proofing and Baking
Allow dough to proof, seam side up, in the proofing basket at room temperature or overnight in the refrigerator, covered.
Bake your loaves with your preferred method.
At Osono Bread, we bake our loaves in a ROFCO oven. We preheat the oven to 250 C for 1.5 hour, score and load dough into the oven, steam, then drop the temperature to 230 C. After 20 minutes, we release the steam, rotate loaves, then bake until loaves are mahogany in color and the sesame seeds are golden brown.
Basic Sourdough from Michael James

Click on book to purchase
Used with permission from Michael James
https://www.michaeljamesbakes.com/
Listen to Michael James’ interview on The Sourdough Podcast HERE.
Basic Sourdough
Makes one loaf
This is the best starting point if you’re new to making bread. Many of my other recipes extend from this one, so once you’ve got the hang of the basic sourdough, you can start to experiment with different grains, hydration levels, percentages of wholemeal and flavour additions. I like to use wholegrain in my starters and bread, for flavour and texture, as well as nutrition.
This recipe makes one loaf, and I like to double it when baking at home. Once I’ve shaped two loaves, I bake the first, leaving the other in the fridge for a day or two until I need another fresh loaf. You could also use your second loaf to experiment with some of flavour variations.
Ingredients
Starter build
50 g starter
25g bakers flour
25 g wholemeal flour
50 g water
Dough
90 g starter
330 g bakers flour
90 g wholemeal flour
290 g water
8g salt
semolina, for dusting
Method
Starter build
Four to six hours before you plan to mix your dough, combine the starter, flour and water for the starter build, mixing well to combine. You will use 90g of this for the dough; retain the rest for maintaining your starter.
Dough
At least 30 minutes before you plan to mix the dough, combine the flours and water in a large mixing bowl. Mix them with your hands until thoroughly combined, then cover with a damp cloth and set aside for the autolyse.
When the starter is ripe and bubbly, mix it with the flour and water mixture, sprinkle over the salt and finish mixing the dough. Cover with a damp cloth and set aside in a warm place for at least 30 minutes, before your first set of folds.
Complete four sets of folds, resting the dough in between each one for 30–45 minutes.
After your last set of folds, cover your dough with a damp cloth and leave to prove at room temperature for two to three hours.
Shape and final prove
If you have multiplied the recipe, divide the dough into individual loaves before you pre-shape. Pre-shape the dough, then cover with a damp cloth and leave it to rest on the bench for 15–20 minutes.
When the dough has relaxed, shape the dough as desired, then place it seam side up in a lightly floured proving basket. Cover with a damp cloth and set aside for a few hours, or in the fridge overnight, until ready to bake.
Bake your bread
Preheat the oven to the maximum temperature and bake according to your preferred method. Once baked, tip the bread out of the pan onto a wire rack to cool.
From THE TIVOLI ROAD BAKER by MICHAEL JAMES with PIPPA JAMES, published 2017 by HARDIE GRANT BOOKS, an imprint of Hardie Grant Publishing. Copyright © 2017 Michael James and Pippa James.
Apple, Comté (or Gruyère), and Caramel Tartine from POILÂNE
Exclusive recipe from POILÂNE: The Secrets of the World-Famous Bread Bakery
BE SURE TO LISTEN TO Apollonia’s INTERVIEW WITH MIKE HERE.

Apple, Comté (or Gruyère), and Caramel Tartine
Makes 2 tartines; 1 cup caramel
This tartine straddles the line between lunch and dessert, and it also makes a great appetizer or snack. The tartness of the apple complements the rich cheese and the sugary caramel. You need only a couple of tablespoons of this sauce for the tartine, but it keeps well. A tiny bit of lemon juice helps prevent the sugar from crystallizing as it caramelizes but does not affect the flavor. If you prefer not to mix sweet and savory, replace the caramel with whole-grain mustard.
¾ cup (150 g) sugar
⅓ cup (80 ml) water
¼ teaspoon (1 ml) fresh lemon juice
⅓ cup (80 ml) heavy cream
6 tablespoons (3 ounces; 85 g) unsalted butter, cut into pieces
Two 1-inch (2.5-cm)-thick slices Poilâne-Style Sourdough (page 50) or other sourdough
1 Granny Smith apple, cut into matchsticks
8 very thin slices Comté or Gruyère cheese
Flaky sea salt
MAKE THE CARAMEL SAUCE: In a small heavy-bottomed saucepan, combine the sugar, water, and lemon juice, bring to a boil over medium-high heat, and cook, without stirring (swirl the pan occasionally for even cooking), until the sugar melts and the caramel is amber, 10 to 15minutes. (Once the caramel begins to color, it will darken quickly, so watch carefully.)
Immediately remove the pan from the heat and add the cream; be careful, as the mixture will bubble and steam. Return the pan to medium-low heat and stir until smooth. Add the butter a few pieces at a time, stirring until melted. Cool the sauce slightly.
MAKE THE TARTINES: Toast the sourdough on one side until golden.
Spread the caramel evenly on the toasted sides of the bread. Place the apple and cheese slices overthe caramel, sprinkle each tartine with a pinch of flaky salt, and serve with additional caramel sauce, if you like.
NOTE: To store the caramel, let cool to room temperature, cover, and refrigerate for up to 1 month. To reheat, microwave on high, stirring every 20 seconds, or heat in a small saucepan over medium-low heat, stirring. Feel free to add a pinch of salt if using the caramel for a different recipe.
Photo credit is Philippe Vaurès Santamaria, and recipe credit line is: Apple, Comté (or Gruyère), and Caramel Tartine is excerpted from POILÂNE: The Secrets of the World-Famous Bread Bakery © 2019 by Apollonia Poilâne. Photography © 2019 by Philippe Vaurès Santamaria. Reproduced by permission of Houghton Mifflin Harcourt. All rights reserved.

Tourte de meule from Daniel Leader's book LIVING BREAD
Click on the image to purchase book.
Be sure to listen to Daniel’s interview with Mike here.

Tourte de meule
Thirty years ago, the only bakers making this classic French country bread (“millstone bread”) were the Poilâne brothers and a handful of others trying to keep bread traditions alive in an era of increasing industrial bread production. This bread was generally made with a firm levain starter, which fermented slowly and reliably at cool room temperature (these bakeries were often at basement level). This starter gave breads a more pronounced sour flavor because of the predominance of acetic acids produced during fermentation. The Poilânes and their cohort were successful to such a degree that today you can see large miches almost everywhere in France. I myself was an early adopter, producing a Poilâne-style loaf at Bread Alone from the very beginning of my business. With the renewed popularity of big country breads, there has naturally been some experimentation. One of the most important realizations has been that today’s artisan flour, because of careful wheat selection and improved milling practices, can absorb more water than the flours used 30 years ago, especially if the water is added in a particular way. Younger French bakers like Rodolphe Landemaine are more likely than their predecessors to employ the technique of bassinage, in which extra water is slowly added to the dough after autolyse. The result is similar to the classic miche, but with a moister, softer crumb and a larger cell structure. After watching Fabrice Guéry, the head baker at Minoterie Suire, employ bassinage in the mill’s test bakery, I revised my own recipe and this is how we make pain au levain at Bread Alone today.
Start to Finish: 13 to 15 Hours
firm levain starter: 6 to 8 hours
autolyse: 30 minutes
knead: 22 minutes
first fermentation: 3 1/2 hours
final proof: 2 hours
bake: 50 minutes
Makes: one 1.5-kilo loaf
INGREDIENTS BAKER’S % METRIC WEIGHT
FIRM LEVAIN STARTER
Firm Sourdough Starter (page 182) 20 20 g
Water 65 65 g
Type 85 or equivalent flour
(11 to 11.5% protein) 100 100 g
FINAL DOUGH
Type 85 or equivalent flour
(11 to 11.5% protein) 100 726 g
Water 80 580 g
Salt 2.5 18 g
Firm levain starter 25 185 g
1. Prepare the firm levain starter: In a small bowl, mash together the sourdough starter and water to loosen the starter. Stir in the flour until well incorporated, then knead by hand in the bowl for a few minutes until smooth. Cover and let ferment at room temperature (68 to 77 degrees) until doubled in volume, 6 to 8 hours.
2. Autolyse: Combine the flour and 525 g of the water in the bowl of an electric mixer fitted with a dough hook. Mix just until a rough dough forms. Cover and let rest 30 minutes.
3. Make the final dough: Add the salt and levain starter to the bowl. With the dough hook, mix on the low speed (2 on a KitchenAid mixer) until the dough comes together and begins to smooth out, about 5 minutes. Pull the dough off the hook. With the mixer still on low, slowly drizzle the remaining 50 g water, about 10 g at a time, waiting between drizzles until the water is absorbed, about 15 minutes. Turn the mixer to medium-low speed (4 on the KitchenAid) and continue to mix until the dough is soft, elastic, and shiny, another 2 minutes.
4. First fermentation: Use a dough scraper to transfer the dough to a lightly oiled, clear 4-quart container with a lid. Turn the dough over so all sides are oiled. Cover and let stand until the dough is pillowy, 2 to 3 hours. Turn the dough out onto a lightly floured counter. Pat into a 6-by 8-inch rectangle and fold like a business letter. Slide both hands under the dough and flip it over so the folds are underneath. Slip it back into the container, cover, and let stand another 1½ hours.
5. Final proof: On a lightly floured countertop, gently round the dough. Place in a lightly floured banneton, seam side up. Cover with plastic wrap or a kitchen towel and let rest until pillowy, about 2 hours.
6. Bake: About 1 hour before baking, place a baking stone on the middle rack of the oven and a cast-iron skillet on the lower rack. Preheat the oven to 425 degrees for 1 hour. Cover a baker’s peel or rimless baking sheet with parchment. Tip the loaf onto the parchment-lined peel. With a lame, a single-edged razor blade, or a serrated knife, make four slashes, about ½ inch deep, to form a square. Make two small cuts in the center of the loaf to form a small X. Place 1 cup of ice cubes in the skillet to produce steam. Bake until the loaf is golden brown and well risen, about 50 minutes. Slide the loaf, still on the parchment, onto a wire rack. Cool completely. Store in a brown paper bag at room temperature for up to 1 week.
Notes for Professional Bakers
In order to maintain a consistent level of acidity and a balanced flavor in the levain, and therefore in the finished breads, it is very important to be consistent in the feeding process: the proportion of the ingredients (especially starter), water temperature, maturation time, and temperature. At Bread Alone, we scale our levain into 15-kilo pieces, store them in a temperature-controlled environment, and check the development at precise times, measuring the increase in volume and the pH as well. We also taste the levain frequently, to make sure that it is meeting our flavor expectations.
Miches can be retarded overnight after shaping, allowing you some flexibility in your production schedule. At Bread Alone, we hold our miches at 48 degrees for 12 hours, then proof them at 73 degrees until ready for the oven.
Variation: Walnut miche
Add 250 g toasted and cooled walnut pieces to the dough after the bassinage at the end of step 3 and before the final 2 to 3 minutes of mixing. Blend slowly, stopping the mixer in 30-second intervals until the walnuts are incorporated.
From LIVING BREAD by DANIEL LEADER with LAUREN CHATTMAN, to be published on OCTOBER 1, 2019 by AVERY, an imprint of Penguin Random House, LLC. Copyright © 2019 by DANIEL LEADER
Naturally Leavened Banana Bread

“There are few better ways to start your day than a hot cup of coffee and a FAT slice of toasted banana bread with butter. I’m NOT a morning person but thinking about this banana bread really motivates me to get out of bread - I mean bed. This recipe is dairy free (because I love my wife) but can easily be made with butter.”
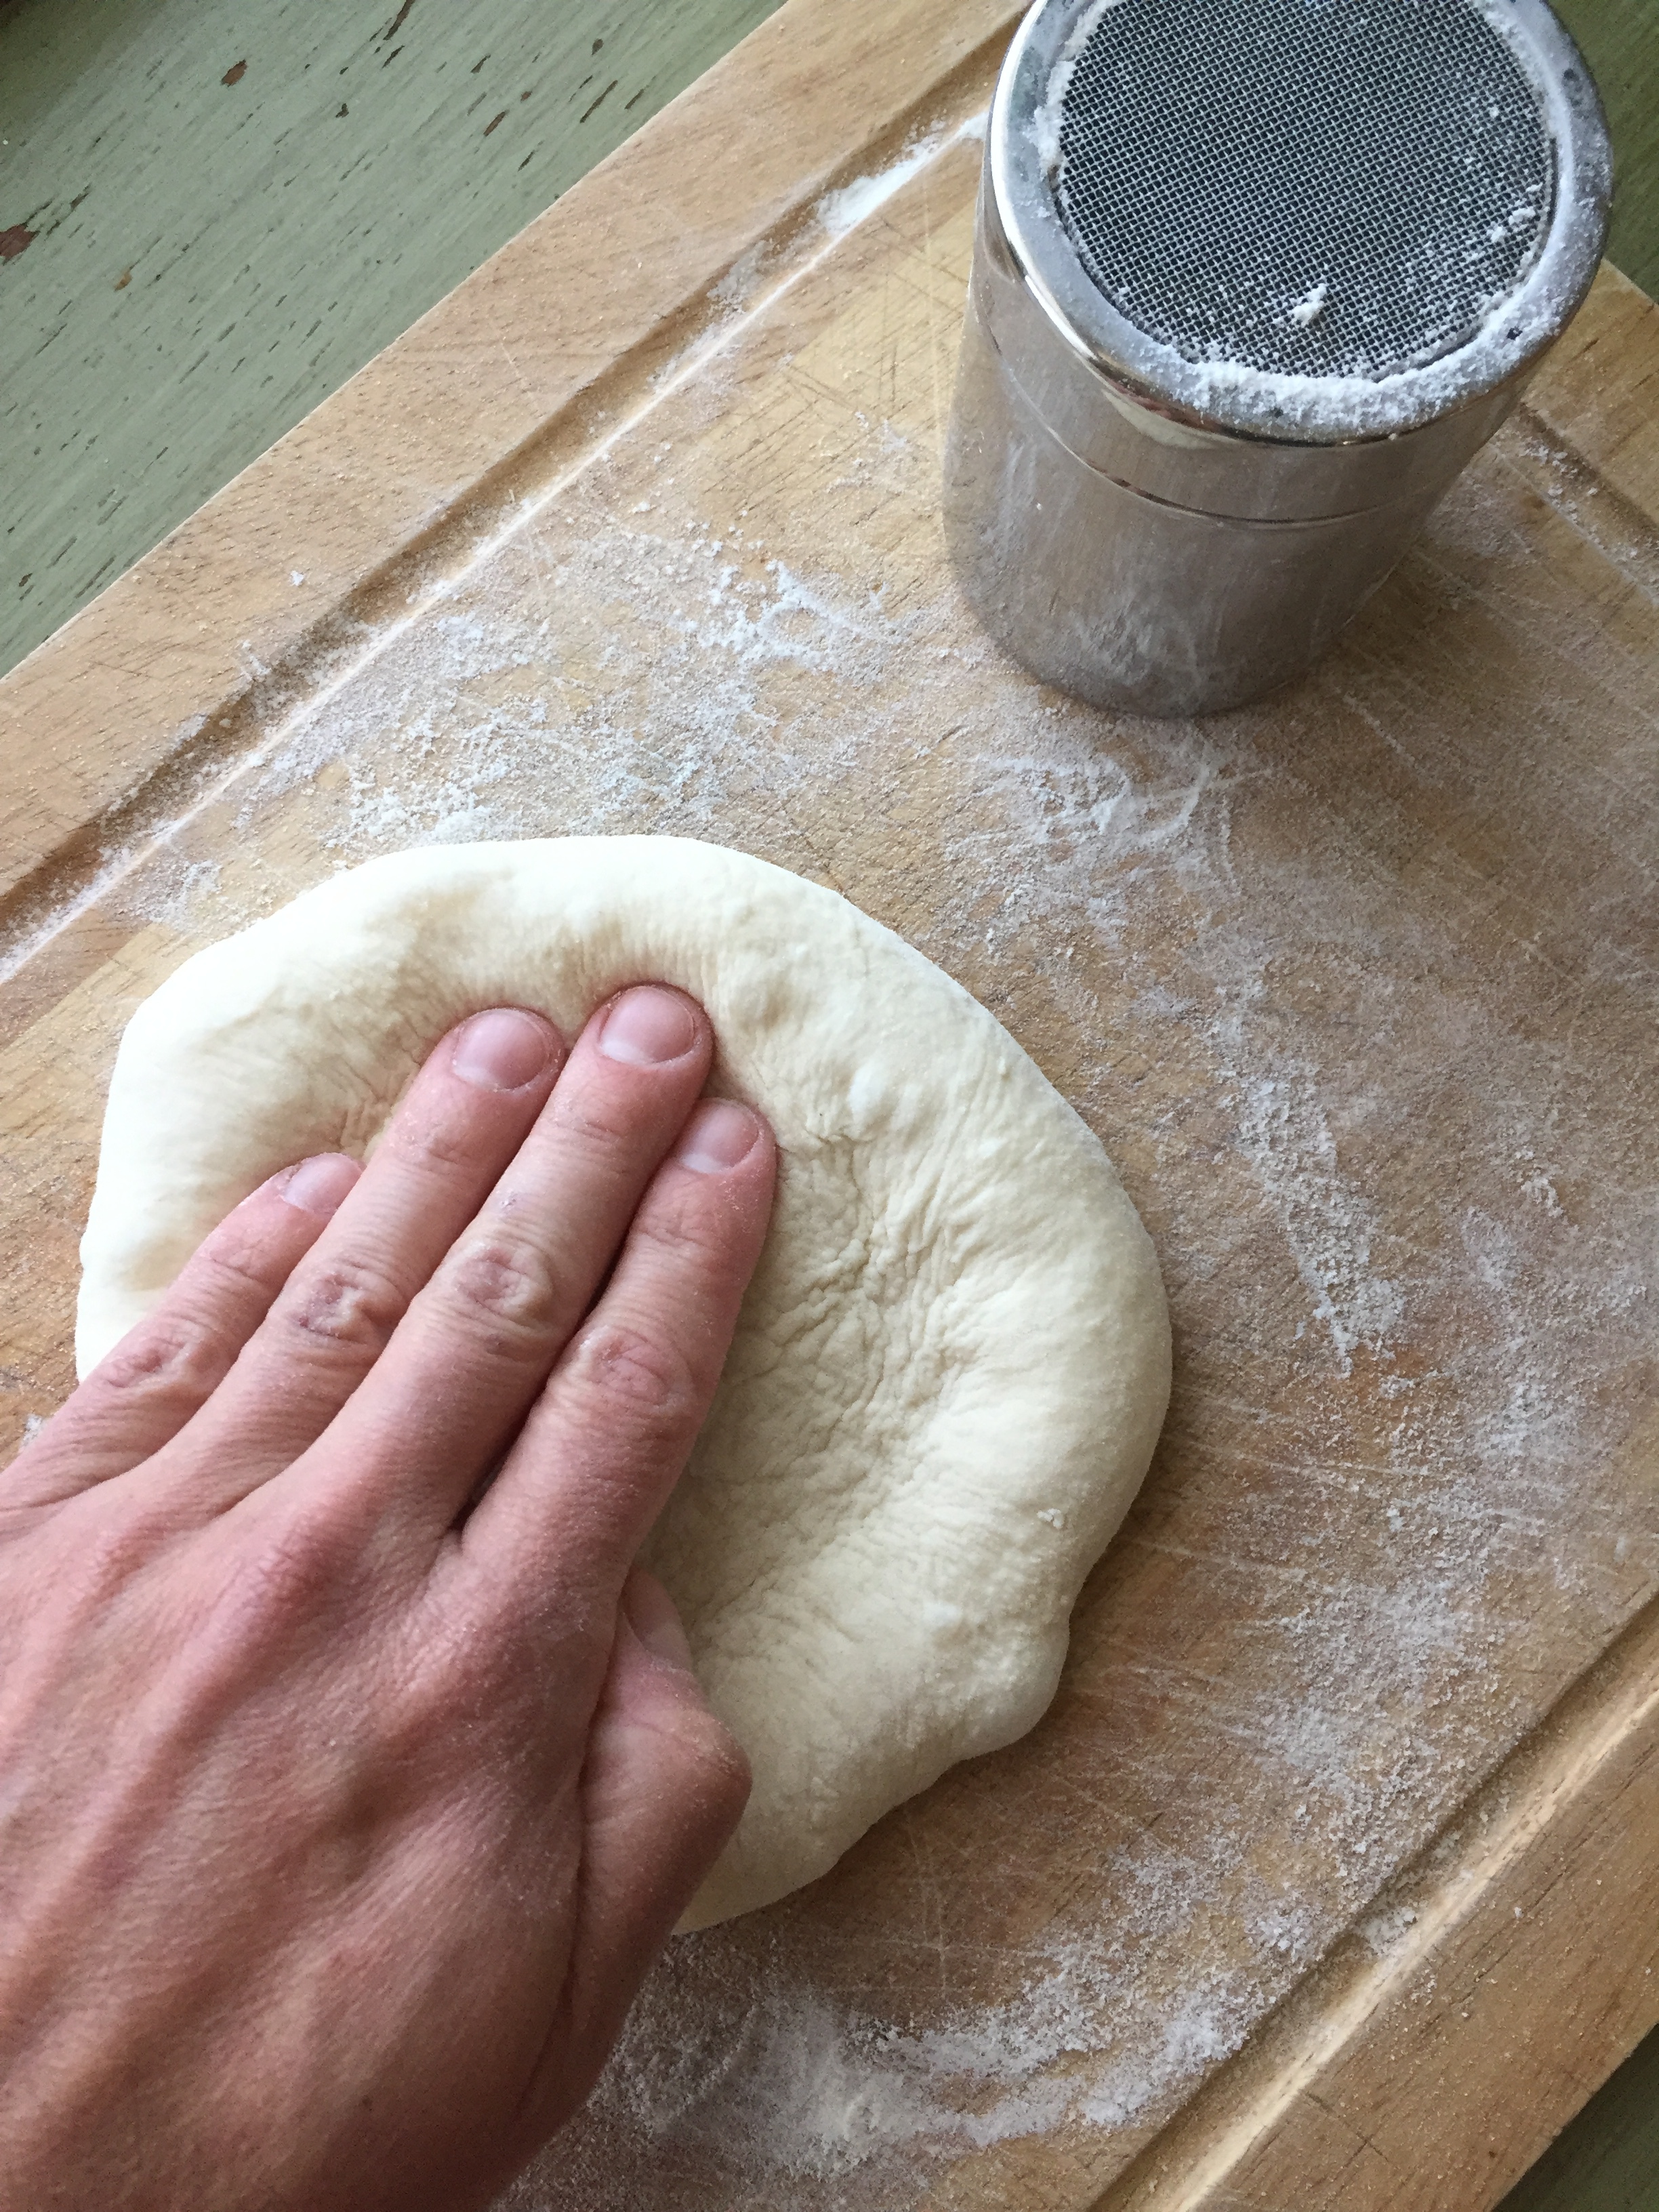
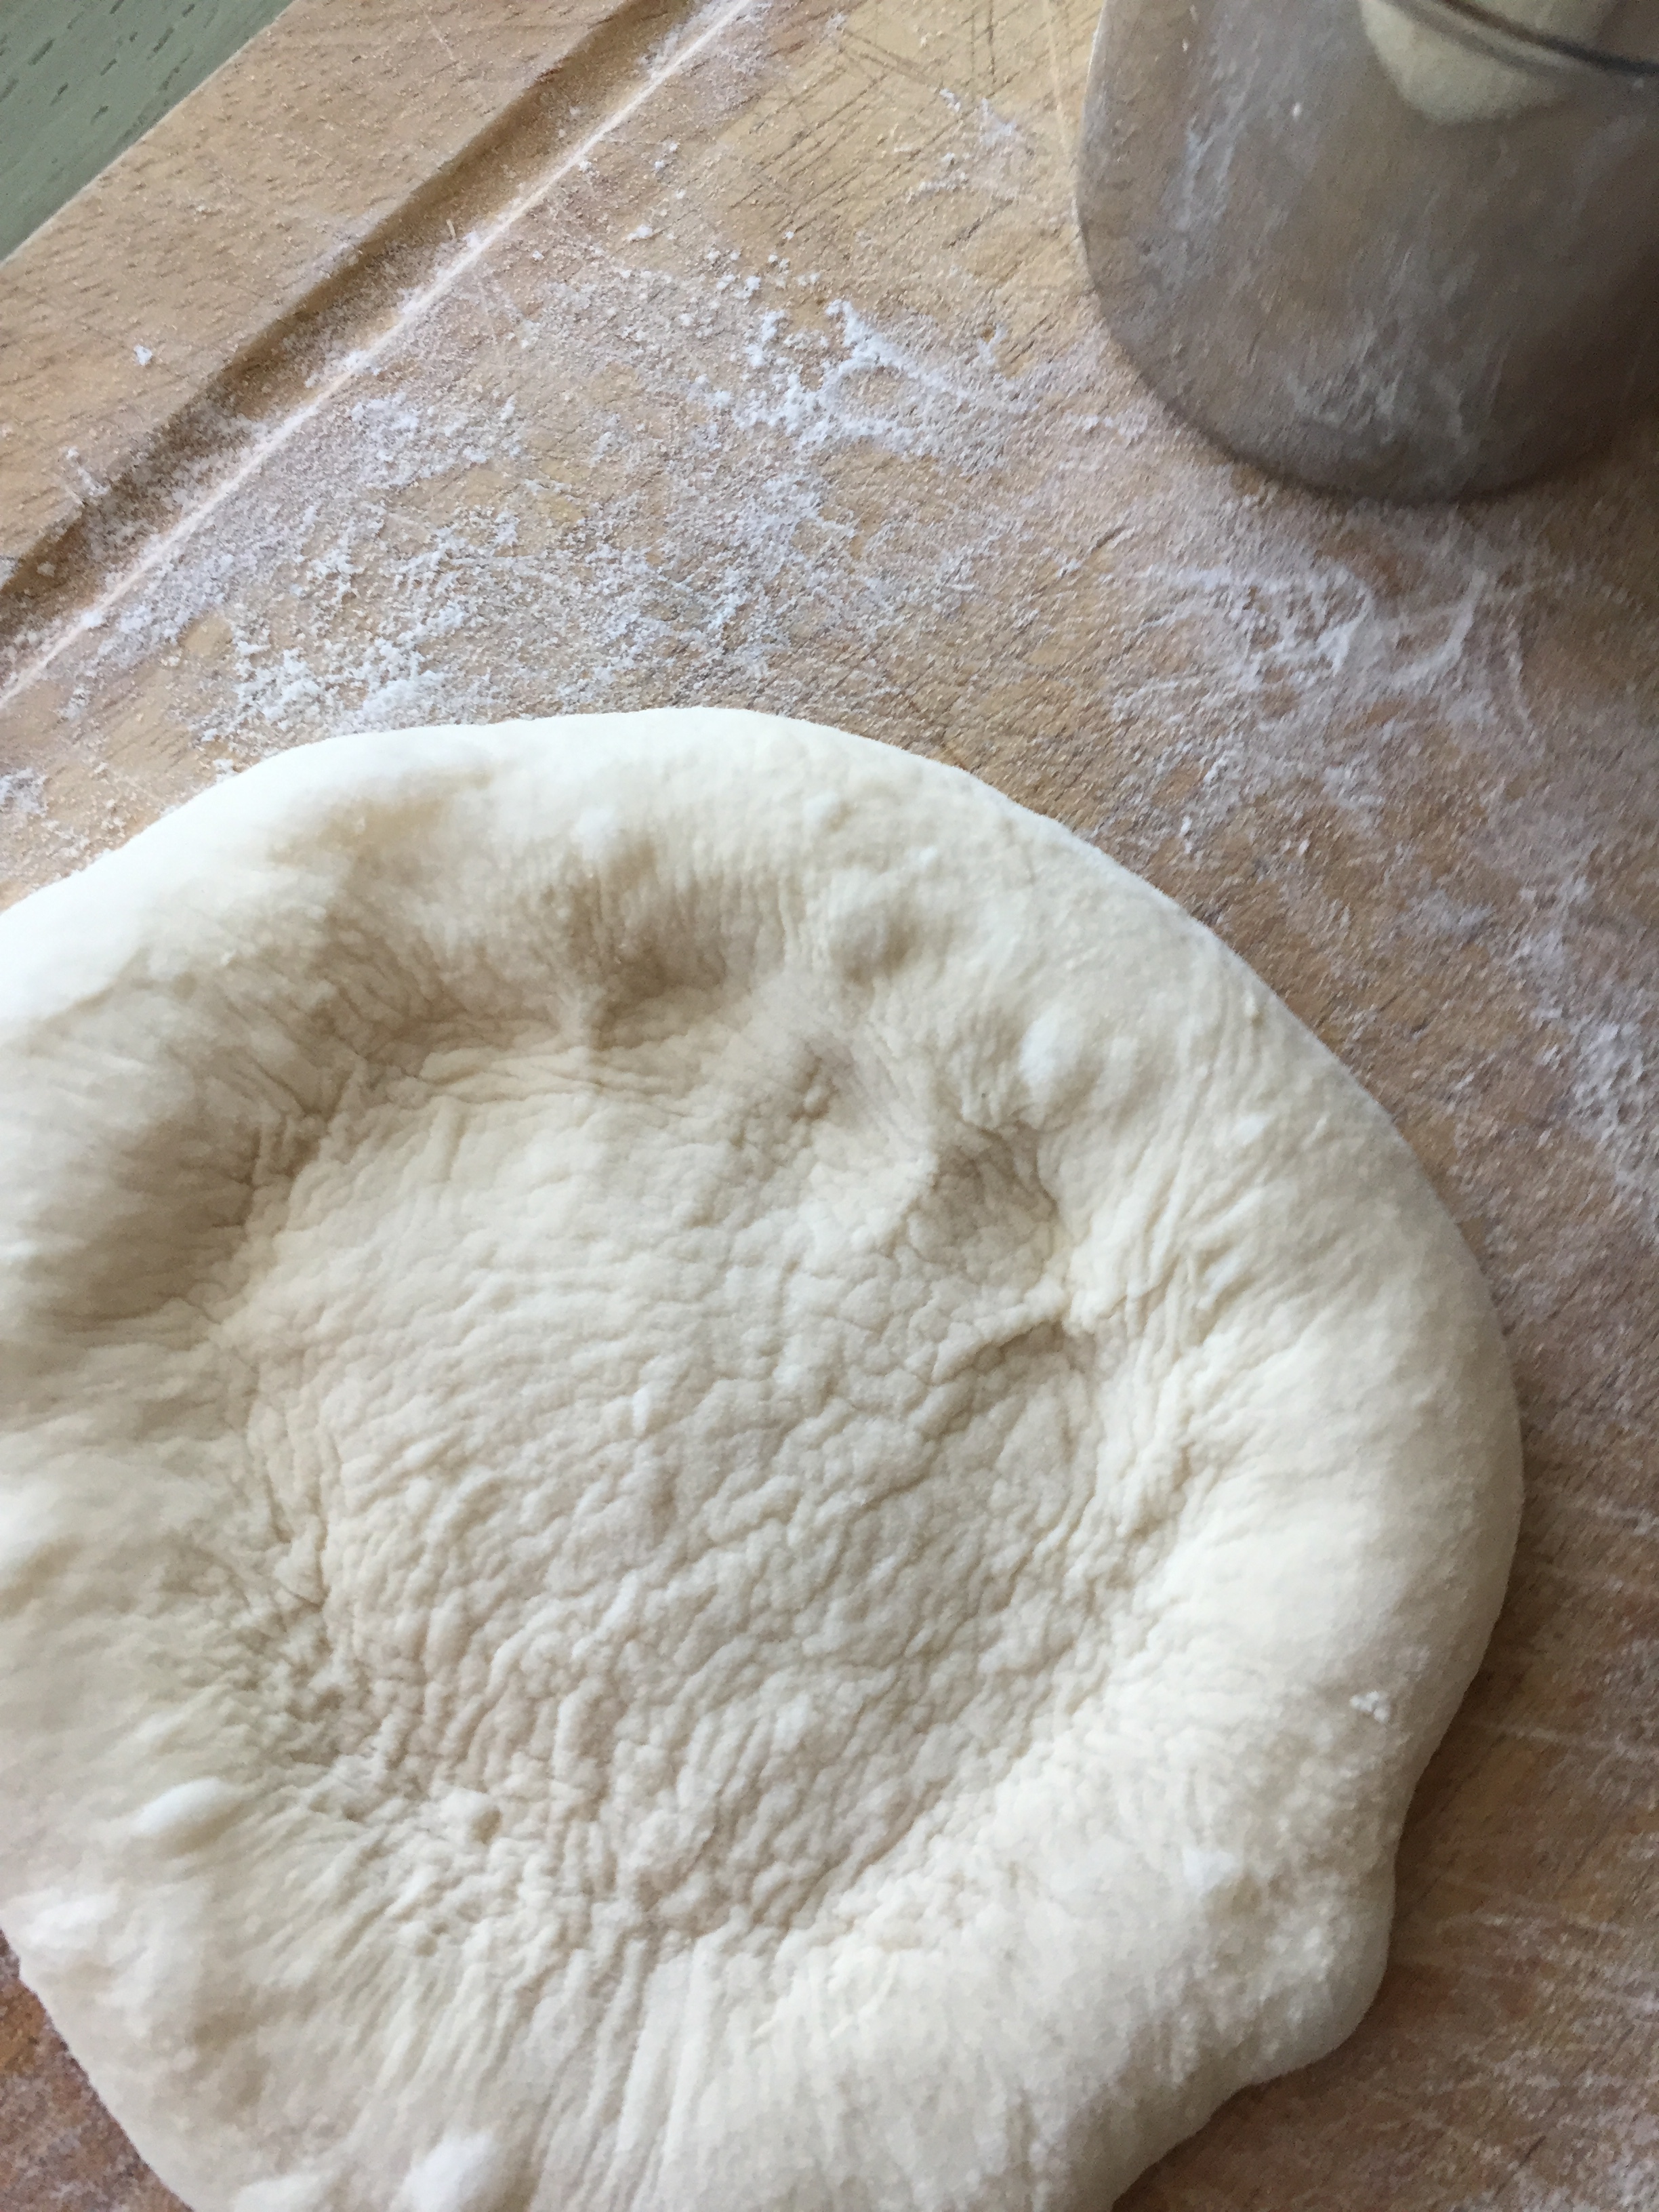
Same Day Sourdough Pizza Dough
SAME DAY SOURDOUGH PIZZA DOUGH
NATURALLY Leavened Pizza Dough

If you’re like me, then you’ll probably agree - the best part of the pizza is the crust! From just about the same time I started my journey to baking my own “perfect loaf,” I also started searching for my perfect pizza crust.
What the “ideal pizza dough” comes down to, for me, is three things: same day prep, naturally leavened, and a delicious, tender, chewy crumb.
Same Day Prep - As a stay at home dad who looks forward to Friday night pizza, I’ve got to be honest, I just don’t have the energy/time at the end of the week to make a 96 hr pizza dough with 32 and a quarter folds. When my wife “punches the clock” at 5pm on Friday, I’m ready for a chill evening with family, good food, and an icy IPA. So pizza dough has to be something that is easy and hasn’t depleted all my energy by the time the weekend starts.
Naturally Leavened - I’ve experimented with various yeasted pizza doughs (so no judgement!) and yes, they are easy and fast. But as a sourdough baker who usually has a starter ready to go, it’s worth the minimal effort to get the benefits and flavor of natural leavening.
Delicious, chewy, open crumb - “It’s all about the flavor” is a quote you’ve probably heard many times on the Podcast. When it comes to pizza crust this mantra holds true. There is nothing more disappointing than a pizza with a bad crust. And if you’re going to the effort of making your own pizza, then flavor is probably already a priority. You simply can’t get the same delicious flavor from instant yeast. A tender, chewy, crispy on the outside, open crumb crust is what you want waiting for you at the end of every slice.
Recipe
What you'll need: sourdough starter, mixing bowl with lid (I like this one), parchment paper, baking stone or baking steel, pizza peel.
Prep time: 8 hours
Cook time: 5-7 mins per pizza
Total time: 8.5 hours
Recipe makes: (3) - 230g doughs (10 inch personal pizzas)
Ingredients
Weight in grams (baker's percentage)
120g Mature 100% Hydration Starter (36%)
330g All Purpose Flour (100%)
230g Warm Water around 100°F (70%)
10g Olive Oil (3%)
7g Sea Salt (2%)
Instructions
The morning of, wake up and feed your starter. Make sure you feed it enough so you have 120g worth to make your dough (so at least 60g flour/60g water). If you want an extra lively starter do two feeds before mixing, one the night before and one in the morning.
After lunch, approx. 4-5 hours before dinner, mix all ingredients together by hand, make sure to use warm water (approx. 100 deg F). Final dough temp 82F.
Place dough in a lightly oiled bowl and cover. Keep in a warm place for a minimum of 4 hours. Dough should double.
About 30 mins before baking, punch down dough (it will be sticky) and pour out on a floured surface. Divide into 230g balls and shape like mini boules (as tight as possible).
While dough balls rest, preheat your oven with pizza stone(s) to 500F or A.H.A.I.G - as hot as it gets! I like to preheat one stone directly under the broiler and another stone on the bottom rack.
Do the final shaping and transfer dough to parchment paper. Add toppings.
5 mins before baking turn the broiler on directly above pizza stone.
Bake first pizza under the broiler, watching closely, for 2 mins. Rotate pizza to get an even bake. At this stage, I’m looking for a little char on the crust and browning for any meat toppings. The bottom of the pizza might still be a little undercooked so…
Drop pizza to bottom rack/stone (to prevent it from burning) and keep the broiler on to reheat the top stone.
After a couple mins, turn off the broiler and, once the flame goes out, move the pizza back to the top stone to finish off the bottom of the pie. I like to see dark brown spots and even a little char on the underside.
Remove pizza and start to process over to bake the remaining pizzas. Total bake time 5-7 mins per pizza. The hotter you can get your pizza stones the fast the bake time should be.